
Advanced Hiking Skills & Trail Techniques: The Complete 2027 Guide

Hiking is one of the most accessible outdoor activities, but becoming a skilled hiker takes much more than buying quality gear or walking longer distances. As trails become steeper, weather more unpredictable, and terrain more challenging, the skills that once seemed optional become essential for both safety and enjoyment.
Experienced hikers don’t simply walk farther—they make better decisions. They read the landscape before checking a GPS, recognize changing weather before the first raindrop falls, conserve energy on long climbs, and adapt to conditions that force others to turn back.
This guide is designed for hikers who already understand the basics and want to develop the practical trail skills used by seasoned backpackers, mountain hikers, and wilderness travelers. Instead of focusing on gear reviews or beginner checklists, we’ll explore the techniques that improve efficiency, confidence, and decision-making in the backcountry.
Throughout this guide, you’ll also find references to more specialized articles that dive deeper into topics such as contour lines, hiking time estimation, high-elevation travel, river crossings, and sustainable trail practices.
Whether you’re preparing for your first mountain trek or working toward multi-day backpacking adventures, these advanced skills will help you hike smarter, safer, and with greater confidence. American Hiking Society also offer valuable educational resources on hiking safety, trail stewardship, and outdoor conservation for hikers of all experience levels.
What You’ll Learn
By the end of this guide, you’ll understand how to:
- Think like an experienced hiker instead of simply following a trail
- Read terrain and recognize natural landscape features
- Navigate confidently using maps, terrain, and GPS
- Move more efficiently across difficult terrain
- Manage energy during long days on the trail
- Adapt to changing mountain weather
- Make better decisions when conditions become challenging
- Reduce environmental impact while exploring the outdoors
These are practical skills that improve with every hike and become increasingly valuable as your adventures take you farther from the trailhead.
Chapter 1: Thinking Like an Experienced Hiker
One of the biggest differences between beginner and experienced hikers has very little to do with fitness or expensive equipment. Instead, it comes down to decision-making.
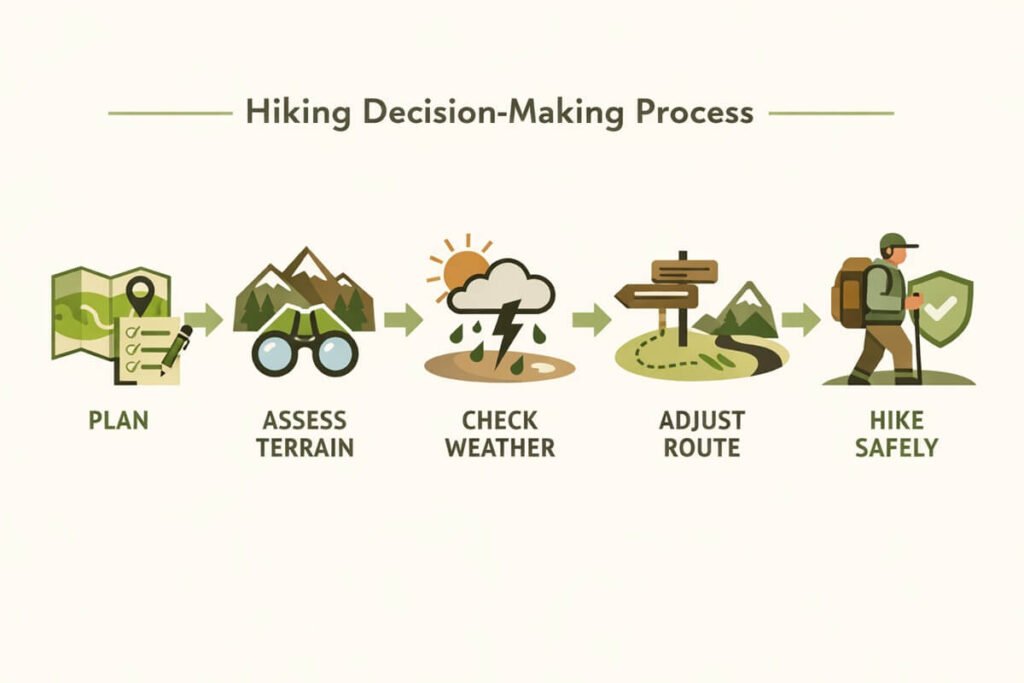
Beginners focus on reaching the destination as quickly as possible. Experienced hikers focus on completing the entire journey safely, efficiently, and with enough energy to enjoy the experience. They constantly evaluate their surroundings, monitor changing conditions, and make small adjustments long before minor problems become major ones.
Developing this mindset is the foundation of advanced hiking.
Plan Beyond Distance
Many hikers judge a route by mileage alone. For example, a 10-mile hike on a flat forest trail is very different from a 10-mile alpine route with 4,000 feet of elevation gain. Before every hike, experienced hikers evaluate several factors:
- Total elevation gain
- Terrain difficulty
- Trail conditions
- Water availability
- Expected weather
- Daylight hours
- Escape routes
- Physical fitness of everyone in the group
These details provide a far more realistic picture of how demanding a hike will be.
Learn to Read the Trail
Instead of looking only at the path directly ahead, experienced hikers constantly observe the environment around them.
Ask yourself:
- Is the trail becoming steeper?
- Is the soil getting wetter?
- Are rocks becoming loose?
- Has vegetation changed?
- Are animal tracks increasing?
- Is the trail exposed to stronger winds?
Small observations often provide early warning signs of changing conditions.
Always Have a Backup Plan
Conditions can change quickly in the outdoors. Storms develop, trails wash out, bridges become impassable, or Injuries happen. Instead of assuming everything will go according to plan, experienced hikers prepare alternatives.
Ask yourself:
- What if the weather changes?
- What if someone becomes injured?
- Where is the nearest exit?
- Is there another route?
- Do we have enough food and water?
Thinking ahead reduces stress and improves decision-making when unexpected situations arise.
Pace Yourself From the Beginning
One of the most common mistakes on long hikes is starting too fast. Adrenaline often causes hikers to:
- Walk faster than necessary
- Climb aggressively
- Skip breaks
- Ignore hydration
Unfortunately, this usually leads to fatigue later in the day. Experienced hikers begin at a comfortable pace that they can maintain for hours rather than minutes. The goal is consistency—not speed.
Develop Situational Awareness
Situational awareness means paying attention to everything happening around you. Instead of focusing only on the trail, observe:
- Changing clouds
- Wind direction
- Wildlife behavior
- Other hikers
- Trail conditions
- Water levels
- Your own physical condition
Many outdoor emergencies can be avoided simply by recognizing warning signs early.
Know When to Turn Around
One of the most important advanced hiking skills is knowing when not to continue. Turning around is not failure. In fact, experienced hikers regularly abandon objectives because conditions no longer support a safe trip. Reasons to turn back might include:
- Approaching thunderstorms
- Rapidly rising rivers
- Deep snow
- Exhaustion
- Injuries
- Navigation uncertainty
- Limited daylight
The mountain will still be there tomorrow. Making conservative decisions often leads to many more successful adventures in the future.
Confidence Comes from Experience
Confidence should come from preparation—not luck. Experienced hikers continually improve by:
- Practicing navigation
- Learning from mistakes
- Hiking in different seasons
- Exploring unfamiliar terrain
- Expanding wilderness knowledge
Each hike becomes another opportunity to develop judgment that can’t be learned from books alone.
Chapter 2: Reading the Landscape
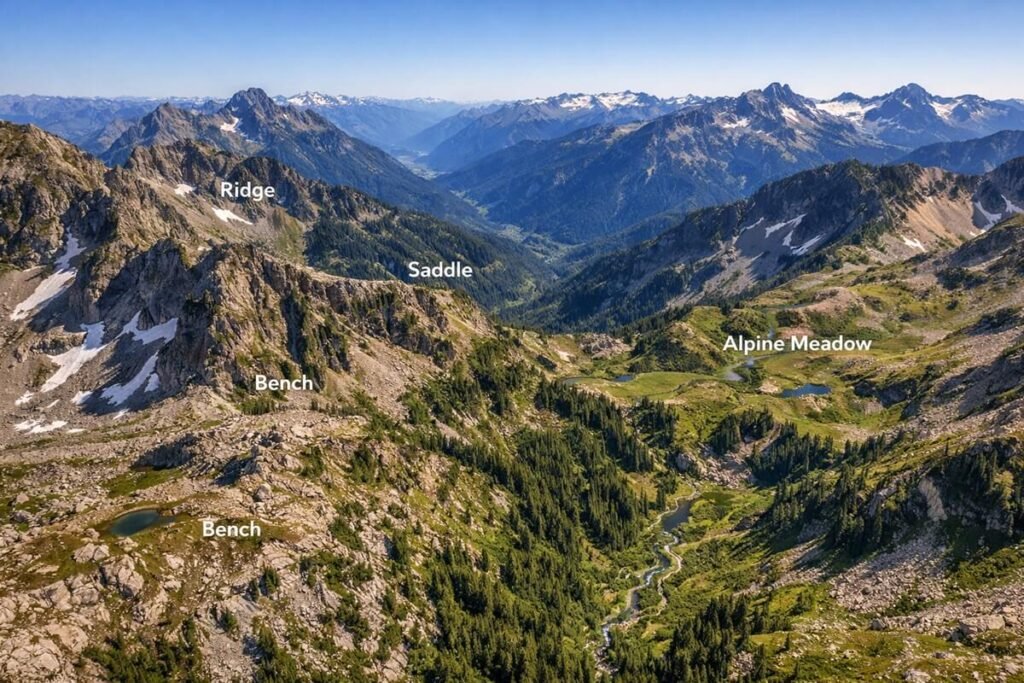
Trails don’t exist in isolation—they follow the natural shape of the land. Learning to read terrain helps you understand where trails are likely to go, identify potential hazards, navigate more efficiently, and make better route decisions. Even when following a well-marked trail, understanding the landscape improves your awareness and confidence.
Ridges
Ridges are long, elevated sections of land that often provide expansive views and relatively dry footing. Advantages of ridge hiking include:
- Better visibility
- Easier navigation
- Lower flood risk
- More consistent breezes
However, ridges are also more exposed to:
- Strong winds
- Lightning
- Rapid weather changes
- Sun exposure
Pay close attention to developing storms when hiking above surrounding terrain.
Valleys
Valleys often contain streams, rivers, and fertile vegetation. Trails through valleys generally offer:
- Reliable water sources
- Gentler gradients
- Greater tree cover
- Wildlife viewing opportunities
However, valleys also experience:
- Mud
- Flooding
- Cooler morning temperatures
- Limited visibility
Understanding these characteristics helps you anticipate changing trail conditions.
Saddles
A saddle is the low point between two higher peaks or ridges. Because saddles naturally connect surrounding terrain, many hiking trails pass through them. When approaching a saddle, expect:
- Increased wind
- Changing weather
- Steeper climbs before reaching the top
- Excellent navigation landmarks
Saddles are useful reference points when reading maps.
Benches
A bench is a relatively flat section located on the side of a mountain. These areas often provide:
- Rest opportunities
- Campsite potential (where permitted)
- Easier travel than steep slopes
- Scenic viewpoints
Recognizing benches helps with both navigation and trip planning.
Drainages
Drainages collect rainwater and snowmelt as water flows downhill. Trails crossing drainages involve:
- Stream crossings
- Wet conditions
- Loose rocks
- Dense vegetation
Heavy rainfall can quickly transform small drainages into dangerous obstacles.
Aspect
Aspect refers to the direction a slope faces. This has a surprisingly large influence on trail conditions.
For example:
South-facing slopes often have:
- More sunlight
- Drier soil
- Less snow
- Warmer temperatures
North-facing slopes often have:
- Longer-lasting snow
- Cooler temperatures
- More moisture
- Denser vegetation
Recognizing aspect helps you predict trail conditions before you arrive.
Terrain Traps
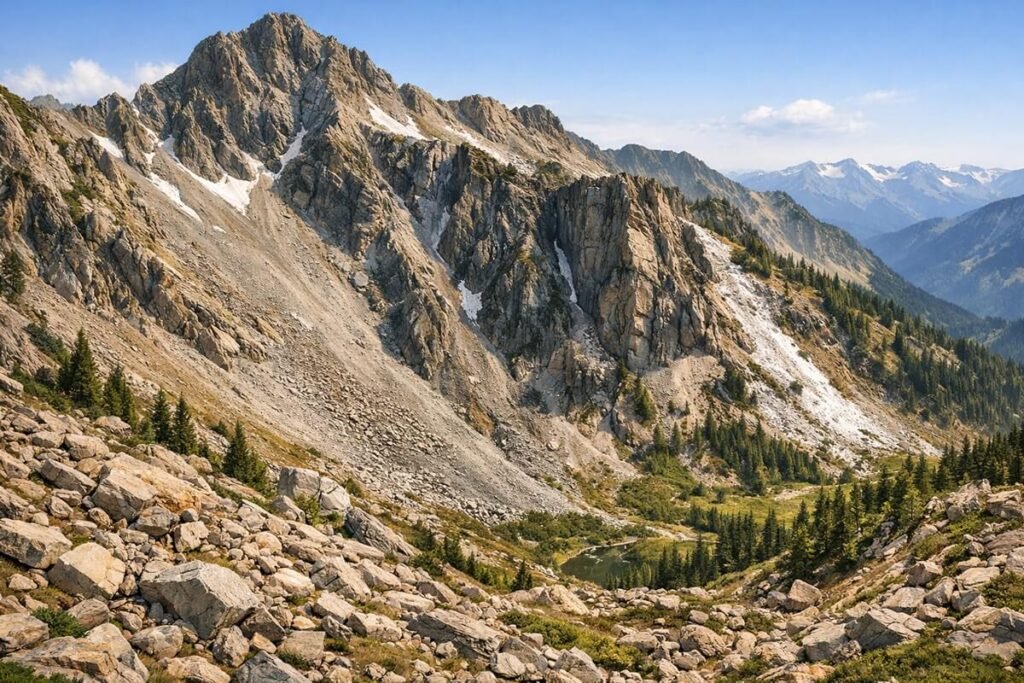
Some landscape features increase risk by concentrating natural hazards.
Examples include:
- Narrow canyons during flash floods
- Loose scree below cliffs
- Avalanche paths in winter
- Unstable riverbanks
- Steep gullies
Avoid assuming every trail is equally safe simply because it appears on a map.
Wildlife Habitat
Different terrain supports different wildlife. You may notice increased wildlife activity near:
- Water sources
- Meadows
- Forest edges
- Berry patches
- Wetlands
Observing habitat helps hikers appreciate ecosystems while remaining aware of potential wildlife encounters. If wildlife viewing interests you, our guide on How to Spot Wildlife While Hiking: Tracks, Sounds & Signs explores this topic in greater detail.
Think in Three Dimensions
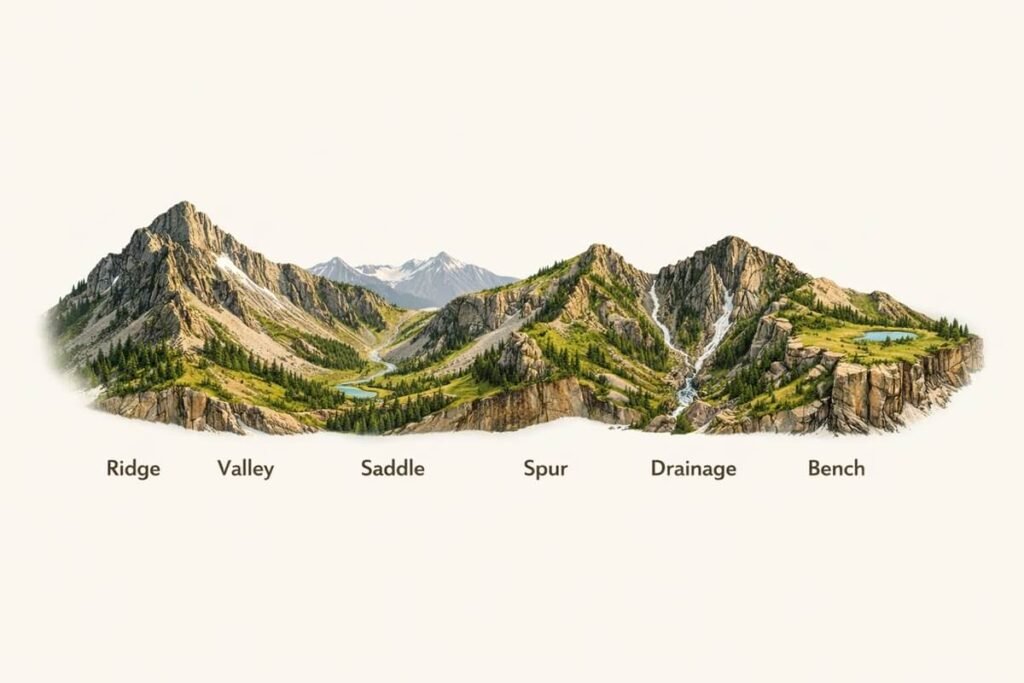
Instead of imagining the landscape as a flat map, visualize it as a three-dimensional environment.
Ask yourself:
- Where is the high ground?
- Where will water flow?
- Which slopes receive the most sun?
- Which areas provide shelter from wind?
This habit greatly improves route planning and navigation.
Chapter 3: Advanced Navigation Skills
Modern GPS devices have made navigation easier than ever, but technology should never replace fundamental navigation skills.
- Batteries fail.
- Phones break.
- Signals disappear.
Experienced hikers know how to combine traditional navigation techniques with modern technology to travel confidently in a wide range of environments.
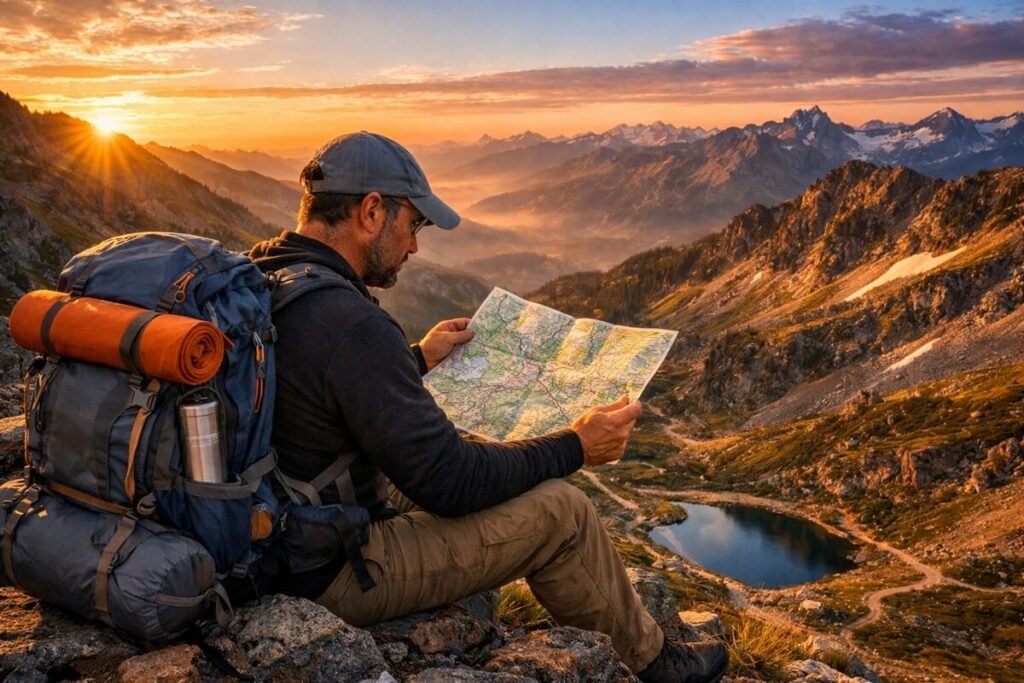
Start With the Map
Every navigation decision begins with understanding the map. Before leaving home, identify:
- Trailheads
- Junctions
- Campsites
- Water sources
- Elevation changes
- Emergency exit routes
- Potential hazards
Taking time to study the route beforehand reduces confusion later. For hikes in the United States, you can also download official USGS topographic maps, which provide highly accurate terrain and elevation data for route planning and navigation. Furthermore, if you’re unfamiliar with topographic maps, our guide How to Print Topographic Maps for Free is an excellent starting point.
Understand Topographic Maps
Contour lines reveal the shape of the land. Although beginners often find them confusing, experienced hikers rely on them to predict:
- Steep climbs
- Gentle slopes
- Valleys
- Ridges
- Summits
- Saddles
Instead of reacting to terrain after you encounter it, contour lines allow you to anticipate what’s ahead.
Terrain Association
One of the most valuable navigation skills is terrain association. Instead of constantly checking your GPS, compare what you see around you with what appears on your map.
Examples include:
- Matching ridges
- Identifying valleys
- Recognizing lakes
- Confirming stream crossings
- Locating mountain peaks
This technique helps you stay oriented throughout the hike.
Use a Compass Correctly
A compass remains one of the most reliable navigation tools available. Experienced hikers use it to:
- Confirm direction
- Take bearings
- Navigate in low visibility
- Verify GPS information
If you’d like to improve these skills, read our detailed guide Hiking with a Compass: Step-by-Step Tips for Staying on Track.
GPS: A Powerful Backup
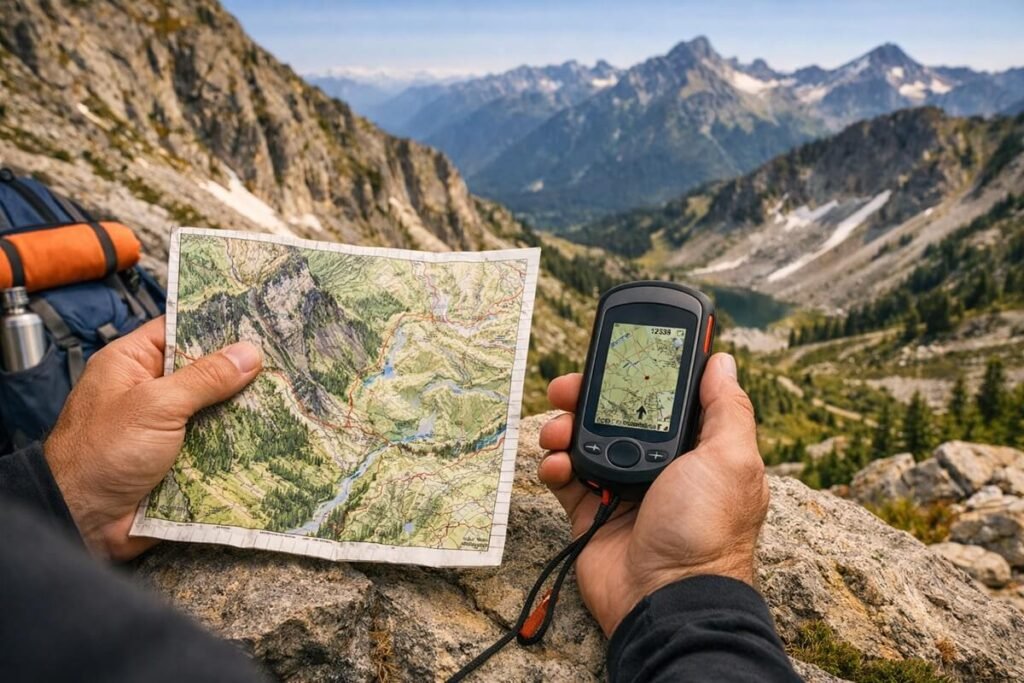
GPS devices and smartphone apps offer tremendous convenience. They help hikers:
- Record tracks
- Measure distance
- Monitor elevation
- Locate campsites
- Share routes
However, avoid relying exclusively on electronic devices. Always carry backup navigation tools.
Recognize Navigation Handrails
Handrails are natural or man-made features that help guide travel. Examples include:
- Rivers
- Ridges
- Roads
- Fence lines
- Coastlines
- Railways
Following a handrail reduces the chance of becoming disoriented.
Identify Attack Points
An attack point is an easily recognizable landmark located near your destination. Instead of navigating directly to a small campsite, for example, you might first navigate to a nearby trail junction, lake, or saddle before making the final approach.
This technique improves accuracy and reduces unnecessary wandering.
Avoid Tunnel Vision
Many hikers focus only on the trail immediately ahead. Instead, periodically stop and look behind you. This helps you:
- Recognize landmarks for the return trip
- Notice alternative routes
- Improve overall awareness
The trail often looks very different in the opposite direction.
Practice Before You Need It
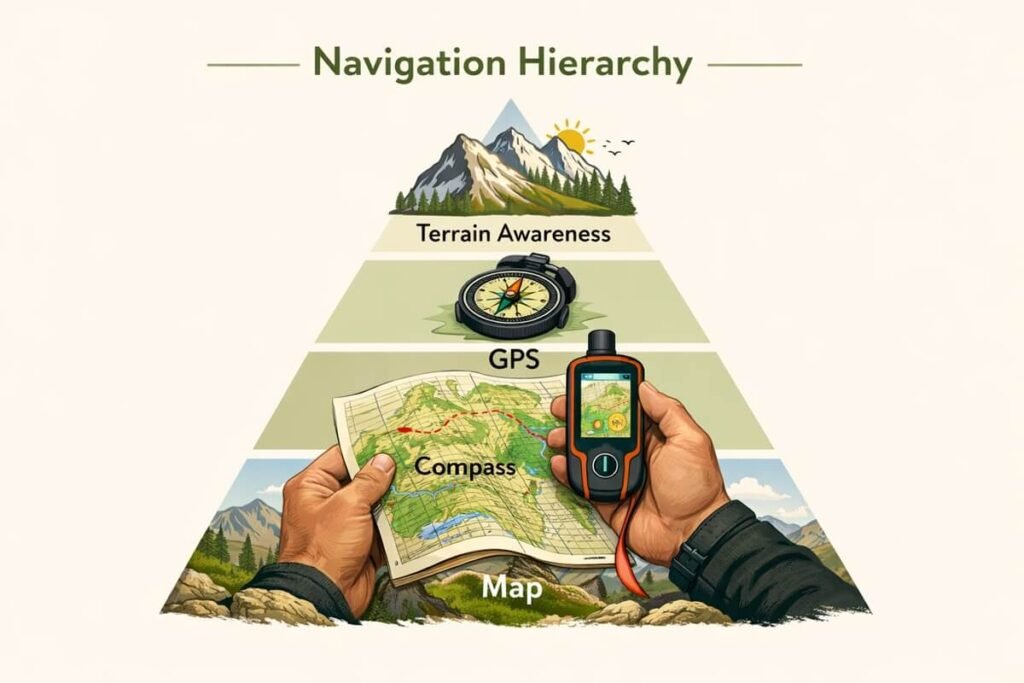
Navigation is a skill that improves through repetition. Practice by:
- Comparing maps to real terrain
- Following contour lines
- Identifying landmarks
- Using your compass regularly
- Checking GPS only after making your own estimate
The more you practice under easy conditions, the more confident you’ll be when visibility decreases or unexpected situations arise.
Chapter 4: Efficient Trail Movement
Covering more miles isn’t always about walking faster. In fact, experienced hikers often move at a pace that appears slower than beginners, yet they consistently travel farther while finishing the day with more energy. The secret lies in efficiency. Every step, breath, and rest break has a purpose.
Instead of fighting the trail, skilled hikers learn to work with the terrain, conserving energy for the moments when it’s needed most.
Find Your Sustainable Pace
One of the biggest mistakes hikers make is trying to match someone else’s speed. Your ideal pace depends on:
- Fitness level
- Pack weight
- Elevation gain
- Terrain
- Weather
- Altitude
Instead of hiking as fast as possible, choose a pace that allows you to maintain a steady conversation without becoming breathless. If you’re constantly stopping to recover, you’re probably moving too quickly.
Maintain a Consistent Rhythm
Frequent changes in speed waste energy. Experienced hikers aim for a comfortable rhythm by:
- Taking even strides
- Avoiding sudden bursts of speed
- Walking smoothly around obstacles
- Matching breathing to movement
Consistency reduces fatigue and makes long days on the trail feel easier.
Short Steps Beat Long Strides
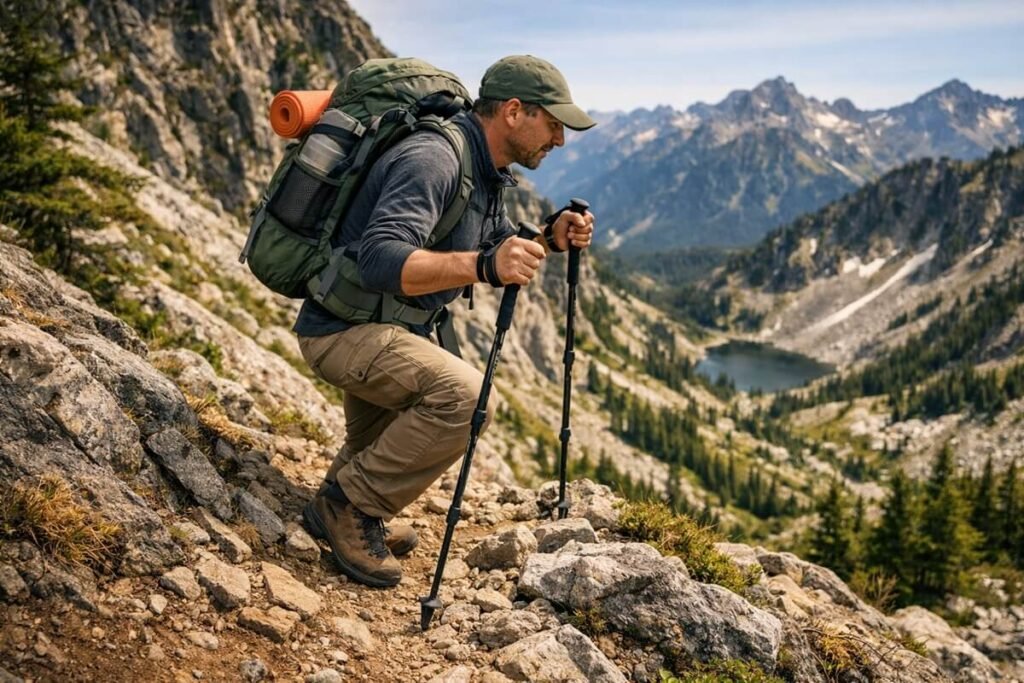
Long strides may feel faster on flat ground, but they become inefficient on climbs.
Instead:
- Shorten your stride.
- Keep your center of gravity balanced.
- Plant your feet securely.
- Maintain forward momentum.
Smaller, controlled steps reduce strain on your knees and help preserve energy during steep ascents.
Use the Rest Step on Steep Climbs
Mountain guides frequently use the rest step to conserve energy during long ascents. The technique involves briefly locking your rear leg with each step, allowing your muscles to recover for a fraction of a second before taking the next step.
Although subtle, this method significantly reduces fatigue during extended climbs. Practice on moderate hills before attempting it on long mountain trails.
Practice Pressure Breathing
As elevation increases, breathing becomes more difficult. Pressure breathing involves forcefully exhaling to remove stale air from your lungs before taking the next breath.
Benefits include:
- Improved oxygen exchange
- Reduced breathlessness
- Better endurance
- More efficient climbing
This technique becomes increasingly valuable on high-elevation hikes.
Descend With Control
Many hiking injuries occur while descending—not climbing. When hiking downhill:
- Shorten your stride.
- Lean slightly forward instead of backward.
- Keep knees slightly bent.
- Look several steps ahead.
- Avoid rushing.
Controlled descents place less stress on joints and improve stability on loose terrain.
Use Switchbacks Properly
Switchbacks reduce trail steepness by creating gradual zigzag climbs. Stay on established switchbacks rather than cutting directly uphill.
This:
- Conserves energy.
- Protects vegetation.
- Reduces erosion.
- Maintains trail quality.
Cutting switchbacks damages trails and increases long-term maintenance needs.
Use Trekking Poles Efficiently
When used correctly, trekking poles improve both balance and endurance. Rather than simply planting them randomly:
- Adjust pole length for terrain.
- Coordinate pole movement with your stride.
- Apply gentle pressure instead of excessive force.
On descents, poles reduce impact on knees. On climbs, they help distribute effort across your upper body. If you’re choosing your first poles, see our guide The 5 Best Budget hiking Poles of 2026 or Top 5 Trekking Poles for Seniors.
Take Smart Breaks
Many beginners either stop too often or wait until they’re completely exhausted.
Instead:
- Rest briefly before fatigue becomes overwhelming.
- Eat small snacks regularly.
- Drink consistently.
- Stretch tight muscles during longer breaks.
Frequent short breaks often work better than long, infrequent stops.
Estimate Hiking Time Realistically
Distance alone rarely predicts hiking time accurately. Elevation gain, terrain difficulty, weather, and pack weight all influence your pace.
Chapter 5: Terrain-Based Hiking Techniques
Every trail presents unique challenges. A technique that works well on a smooth forest path may become ineffective—or even dangerous—on loose rock, wet roots, or steep snowfields. Experienced hikers continuously adjust their movement to match the terrain beneath their feet.
Rocky Trails
Rocky trails demand careful foot placement. Instead of looking directly at your feet, scan several steps ahead and choose stable surfaces. Whenever possible:
- Step on large, solid rocks.
- Avoid loose stones.
- Test questionable footing before committing your weight.
- Keep three points of balance when scrambling.
Rushing through rocky terrain often leads to twisted ankles.
Loose Scree
Scree consists of small, loose rocks covering mountain slopes. Because the surface shifts easily:
- Keep your weight centered.
- Take short steps.
- Avoid sudden movements.
- Allow your feet to move naturally with the slope.
Attempting to fight the terrain usually wastes energy.
Talus Fields
Talus differs from scree because it consists of much larger rocks. Crossing talus requires patience.
Watch for:
- Hidden gaps
- Unstable boulders
- Wet surfaces
- Sharp edges
Move deliberately and avoid jumping between rocks whenever possible.
Mud
Mud isn’t always as slippery as it appears—but choosing the wrong line can quickly lead to falls. Instead of walking around muddy sections and widening the trail:
- Stay on durable surfaces when practical.
- Use trekking poles for balance.
- Plant your feet flat.
- Avoid quick direction changes.
Protecting the trail is part of responsible hiking.
Tree Roots
Roots become especially slippery after rain. Cross them by:
- Stepping directly over them.
- Maintaining steady momentum.
- Avoiding sideways foot placement.
- Using poles if necessary.
Treat wet roots like ice.
Wet Rock
Smooth rock surfaces near waterfalls and streams can be surprisingly slick.
Look for:
- Rough-textured surfaces
- Dry edges
- Stable footing
Never assume a rock is safe simply because others have crossed it.
Sand
Walking on sand requires more energy than most hikers expect. To improve efficiency:
- Shorten your stride.
- Maintain steady momentum.
- Walk on firmer, damp sand whenever available.
Soft sand quickly increases fatigue.
Snow
Snow conditions change throughout the day. Morning snow often provides firmer footing, while afternoon snow may become soft and unstable. If hiking in snow:
- Evaluate avalanche risk.
- Watch for hidden holes.
- Use traction devices when necessary.
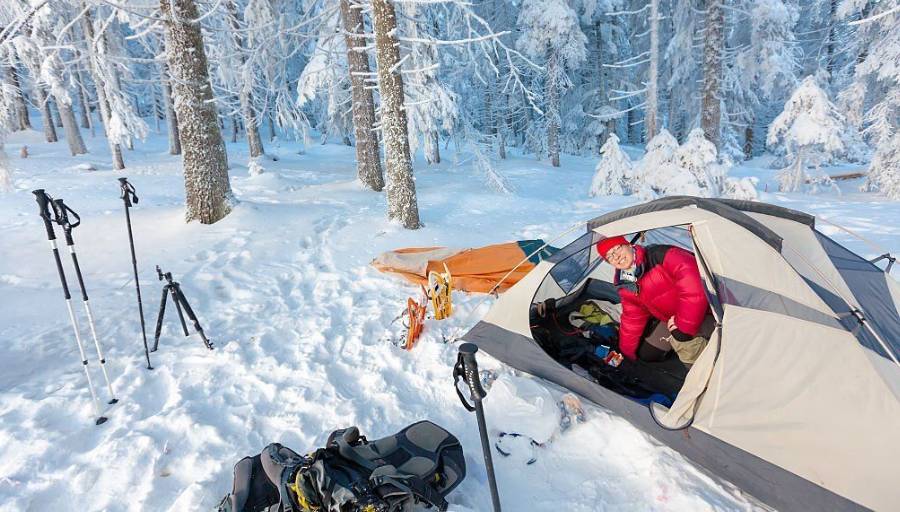
For more winter hiking advice, see our guides Hiking and Camping in Snow and What to Wear Hiking in Winter: The 3-Layer Clothing System.
Bushwhacking
Off-trail travel requires significantly more effort than following established paths. When moving through dense vegetation:
- Protect your eyes.
- Watch for hidden obstacles.
- Move slowly.
- Continuously verify your location.
Bushwhacking should only be attempted with strong navigation skills.
Adapt Constantly
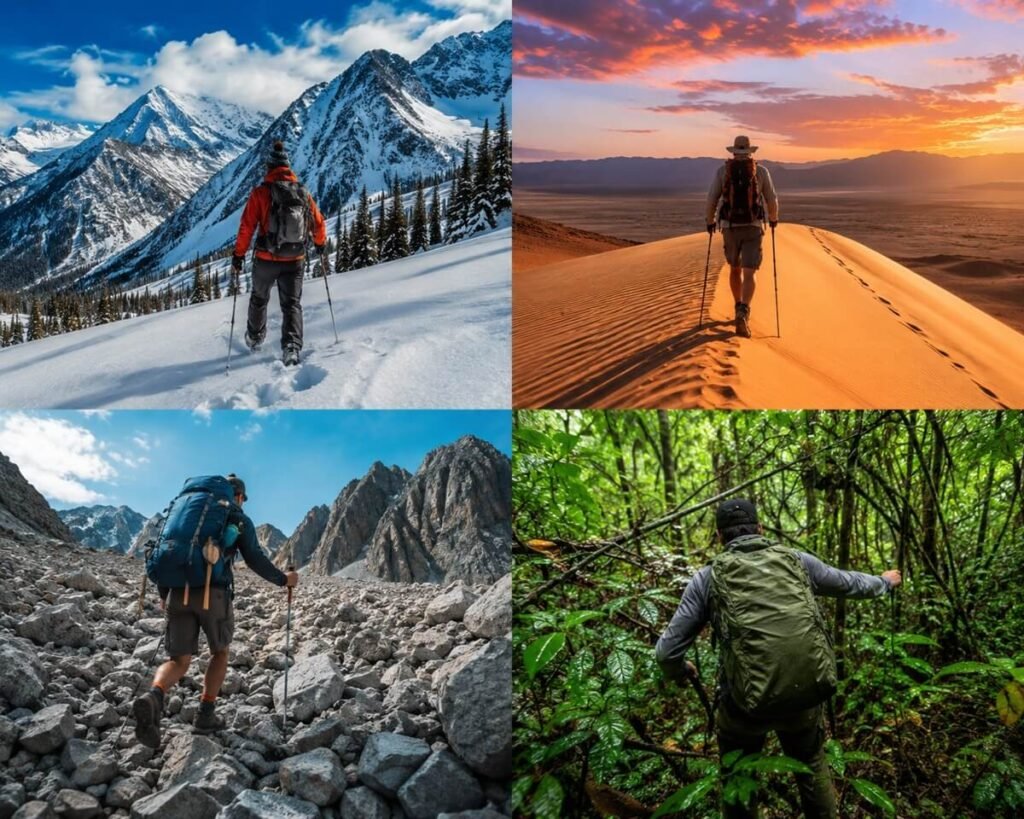
No two trails are identical. Experienced hikers continuously ask:
- Has the terrain changed?
- Do I need to adjust my pace?
- Is another route safer?
- Are conditions worsening?
Small adjustments throughout the day improve both safety and efficiency.
Chapter 6: Understanding Mountain Weather & Microclimates
Weather is one of the few variables hikers cannot control—but it can often be anticipated. Mountain weather changes much faster than weather in lowland environments, making observation just as important as checking the forecast.
Experienced hikers continuously evaluate conditions throughout the day rather than relying solely on the morning weather report. Before leaving home, always check the latest National Weather Service forecast for your hiking area. Local mountain forecasts often provide more accurate information about storms, temperature changes, and hazardous weather than general weather apps.
Why Mountain Weather Changes Quickly
Mountains influence weather in several ways. As air rises:
- Temperatures decrease.
- Moisture condenses.
- Clouds develop.
- Wind patterns shift.
This means sunny mornings can become stormy afternoons with little warning.
Watch the Sky
Clouds provide valuable information. While cloud identification isn’t an exact science, experienced hikers monitor:
- Rapid cloud growth
- Darkening skies
- Lowering cloud bases
- Building thunderstorms
- Fast-moving cloud layers
These changes often signal deteriorating conditions.
Understand Wind
Wind affects much more than comfort. Strong winds increase:
- Heat loss
- Balance challenges
- Falling branch hazards
- Difficulty communicating
Wind direction also provides clues about approaching weather systems. Exposed ridges often experience significantly stronger winds than nearby valleys.
Temperature Changes
Temperature can vary dramatically during a single hike. Factors include:
- Elevation gain
- Shade
- Wind
- Cloud cover
- Time of day
Carry clothing that allows you to adjust gradually rather than waiting until you’re already cold or overheated.
Microclimates
A microclimate is a small area where weather differs noticeably from surrounding terrain. Examples include:
- Cool valleys
- Sunny south-facing slopes
- Windy ridgelines
- Sheltered forests
- Moist creek bottoms
Recognizing microclimates helps hikers anticipate changing trail conditions.
Storm Awareness
Thunderstorms deserve immediate attention. If you observe:
- Thunder
- Lightning
- Rapid cloud buildup
- Strong gusting winds
Consider altering your plans immediately.
Avoid:
- Isolated trees
- Exposed ridges
- Summits
- Open meadows
If conditions become unsafe, descending to lower terrain is often the best decision. For additional guidance, read Hiking in a Storm: Safety Tips You Need to Know.
Rain Isn’t Always Dangerous
Rain itself isn’t usually the greatest concern. Instead, evaluate how rain changes the environment. Heavy rainfall can lead to:
- Slippery rocks
- Rising streams
- Muddy trails
- Reduced visibility
- Falling branches
Prepare your route accordingly. For more practical advice, see Hiking in the Rain: What to Wear, Safety Tips & Gear Guide (2026).
Learn to Read the Environment
Experienced hikers constantly observe:
- Wind shifts
- Temperature changes
- Cloud movement
- Wildlife behavior
- Humidity
- Visibility
These subtle clues often provide more useful information than weather apps alone.
Don’t Let Summit Fever Take Over
Many accidents occur because hikers continue toward a destination despite worsening conditions.
Remember:
- The summit is optional.
- Returning safely is mandatory.
Successful hikers understand that turning around can be the smartest decision of the day.
Chapter 7: Energy Management for Long Hikes
Physical fitness is important, but it isn’t the only factor that determines whether you’ll finish a long hike feeling strong or completely exhausted. Experienced hikers understand that energy is a limited resource. The goal isn’t simply to move faster—it’s to manage your energy so you can maintain a steady pace from the trailhead to the finish.
Small decisions made throughout the day often have a greater impact than raw athletic ability.
Start Conservatively
The excitement at the beginning of a hike causes many people to walk faster than necessary. Unfortunately, the energy you waste in the first hour is difficult to recover later.
Experienced hikers begin at about 70–80% of their maximum effort, allowing their bodies to warm up gradually while preserving strength for tougher terrain ahead. If the trail becomes more demanding later, you’ll be glad you didn’t burn through your energy too early.
Eat Before You’re Hungry
Your body needs a steady supply of carbohydrates, fats, and fluids during long hikes. Waiting until you’re hungry usually means you’re already running low on energy. Instead, aim to eat small snacks every 60–90 minutes. Good trail snacks include:
- Nuts and seeds
- Energy bars
- Dried fruit
- Beef jerky
- Nut butter packets
- Cheese
- Trail mix
If you’re looking for lightweight options, check out our guide to the 5 Best Energy Bars for Hiking: Tested on Long Trails.
Stay Ahead of Dehydration
Even mild dehydration reduces endurance, concentration, and coordination. Instead of drinking large amounts infrequently, sip water regularly throughout the day. Factors that increase water needs include:
- Hot weather
- High elevation
- Heavy packs
- Long climbs
- Dry climates
Electrolytes also helpful during extended hikes, especially when you’re sweating heavily. During hot-weather hikes, it’s also worth reviewing the CDC’s heat safety recommendations, which explain how to recognize early signs of heat exhaustion, dehydration, and heat stroke before they become emergencies.
For a deeper look at hydration strategies, see our articles Hydration While Hiking: Expert Tips to Stay Safe, Prevent Dehydration & Boost Performance and Managing Water When Hiking: Tips to Stay Hydrated & Safe.
Recognize Early Fatigue
Experienced hikers pay attention to subtle warning signs before fatigue becomes severe. Common indicators include:
- Shorter stride length
- Slower reaction time
- Poor balance
- Increased stumbling
- Difficulty concentrating
- Frequent stops
Addressing fatigue early with food, water, or a short break is far more effective than pushing through until exhaustion.
Avoid “Bonking”
Bonking is a sudden loss of energy caused by depleted glycogen stores.
It often results in:
- Extreme fatigue
- Weakness
- Dizziness
- Irritability
- Difficulty thinking clearly
Bonking is easier to prevent than to recover from. Regular nutrition and pacing are your best defenses.
Mental Energy Matters Too
Long hikes challenge your mind as much as your body. Poor weather, difficult terrain, and hours of repetitive movement can reduce motivation. Experienced hikers stay mentally engaged by:
- Breaking long hikes into smaller goals
- Celebrating milestones
- Maintaining a positive attitude
- Staying aware of changing conditions
- Avoiding unnecessary stress
Mental resilience often determines whether a challenging hike remains enjoyable.
Know When to Rest
Rest isn’t a sign of weakness. It’s part of efficient hiking.
Choose rest locations that offer:
- Shade
- Wind protection
- Comfortable seating
- Safe footing
- Access to water (when appropriate)
Avoid resting for so long that your muscles become stiff or cold.
Adjust Expectations
Not every hike goes according to plan.
- Weather changes.
- Trails become more difficult than expected.
- Fitness varies from day to day.
Experienced hikers adjust their expectations rather than forcing unrealistic goals. Finishing safely is always more important than completing a planned distance.
Chapter 8: High-Elevation Hiking Skills
Hiking at higher elevations introduces challenges that many lower-elevation hikers have never experienced. Reduced oxygen, stronger sunlight, colder temperatures, and rapidly changing weather all require thoughtful preparation.
Understanding these differences allows you to enjoy mountain environments while reducing unnecessary risks.
What Changes at Higher Elevation?
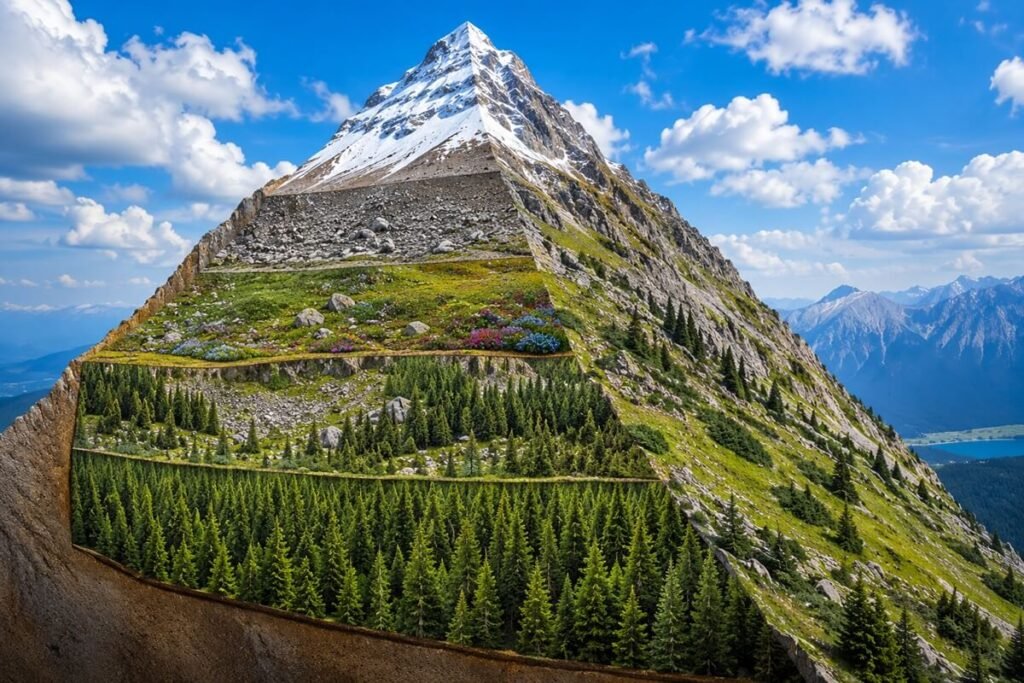
As elevation increases:
- Air pressure decreases.
- Oxygen becomes less available.
- Temperatures generally drop.
- UV radiation becomes stronger.
- Weather changes more rapidly.
These changes affect every hiker differently. Even experienced hikers may notice reduced performance when visiting significantly higher elevations.
Acclimatization
Your body needs time to adapt to thinner air. Acclimatization occurs gradually over several days. Helpful strategies include:
- Ascend gradually whenever possible.
- Sleep at lower elevations before major climbs.
- Stay hydrated.
- Avoid excessive exertion on the first day.
- Listen to your body.
There’s no shortcut to proper acclimatization.
Watch for Altitude Illness
Altitude sickness can affect hikers regardless of fitness level. Common symptoms include:
- Headache
- Nausea
- Fatigue
- Loss of appetite
- Dizziness
- Poor sleep
Ignoring symptoms can lead to more serious conditions. If symptoms worsen, descending is often the safest option. Our guide How to Deal with Altitude Sickness While Hiking provides a detailed overview of prevention and treatment.
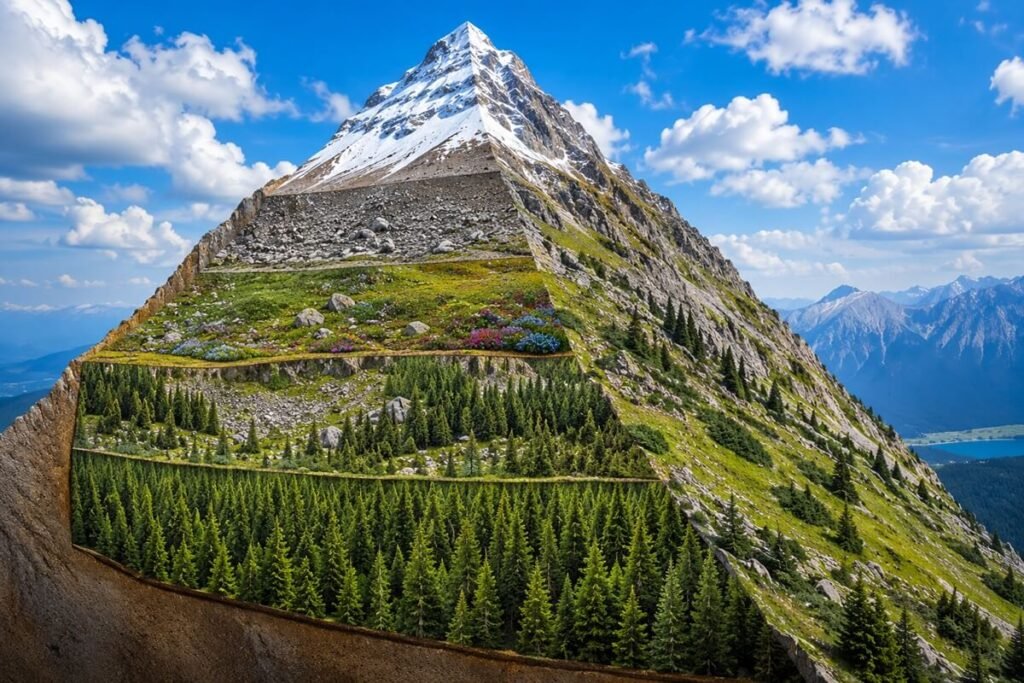
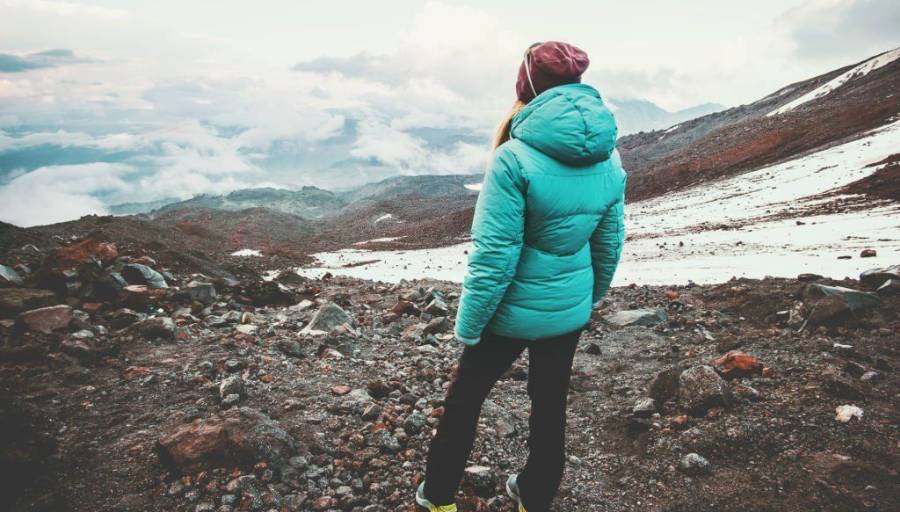
Hiking Above the Tree Line
Above the tree line, the environment becomes noticeably different. You’ll encounter:
- Increased wind exposure
- Less shelter
- Stronger sunlight
- Faster weather changes
- More exposed terrain
Route planning becomes especially important because escape options may be limited.
Sun Protection Matters More
Many hikers underestimate the intensity of high-elevation sunlight. Protect yourself by:
- Wearing UV-protective sunglasses.
- Applying sunscreen regularly.
- Covering exposed skin.
- Wearing a brimmed hat.
- Staying hydrated.
Snow can also reflect sunlight, increasing UV exposure.
Monitor the Weather Constantly
Afternoon thunderstorms are common in many mountain ranges. Whenever possible:
- Begin hikes early.
- Reach exposed ridges before afternoon.
- Descend if storms begin developing.
Mountain weather rewards early starts.
Slow Down
One of the biggest mistakes hikers make at elevation is trying to maintain the same pace they use near sea level.
Instead:
- Walk slower.
- Take shorter steps.
- Control your breathing.
- Rest before becoming exhausted.
A sustainable pace allows your body to adapt more effectively.
Respect the Environment
High-elevation ecosystems recover slowly. Stay on established trails whenever possible.
Avoid:
- Damaging alpine vegetation.
- Creating social trails.
- Disturbing wildlife.
- Leaving food waste behind.
Small impacts can remain visible for decades.
Chapter 9: Advanced Stream Crossing Techniques
Streams are among the most dynamic obstacles hikers encounter. Water levels can change dramatically after rainfall or snowmelt, turning an easy crossing into a dangerous one within hours. Experienced hikers understand that the safest crossing isn’t always the shortest.
Decide Whether to Cross
The first question should never be “How do I cross?”
Instead ask:
“Should I cross at all?”
If conditions appear unsafe, turning around or finding another route may be the best decision.
No destination is worth risking your life.
Evaluate the Water
Before entering a stream, assess:
- Water depth
- Current speed
- River width
- Bottom surface
- Water clarity
- Downstream hazards
Even shallow water can become dangerous if the current is strong.
Look for Better Crossing Points
The obvious crossing isn’t always the safest. Continue upstream or downstream if necessary. Safer crossings often occur where:
- The river becomes wider.
- Water slows.
- The bottom is firm.
- Multiple channels divide the flow.
Avoid narrow sections where water moves quickly.
Prepare Before Entering
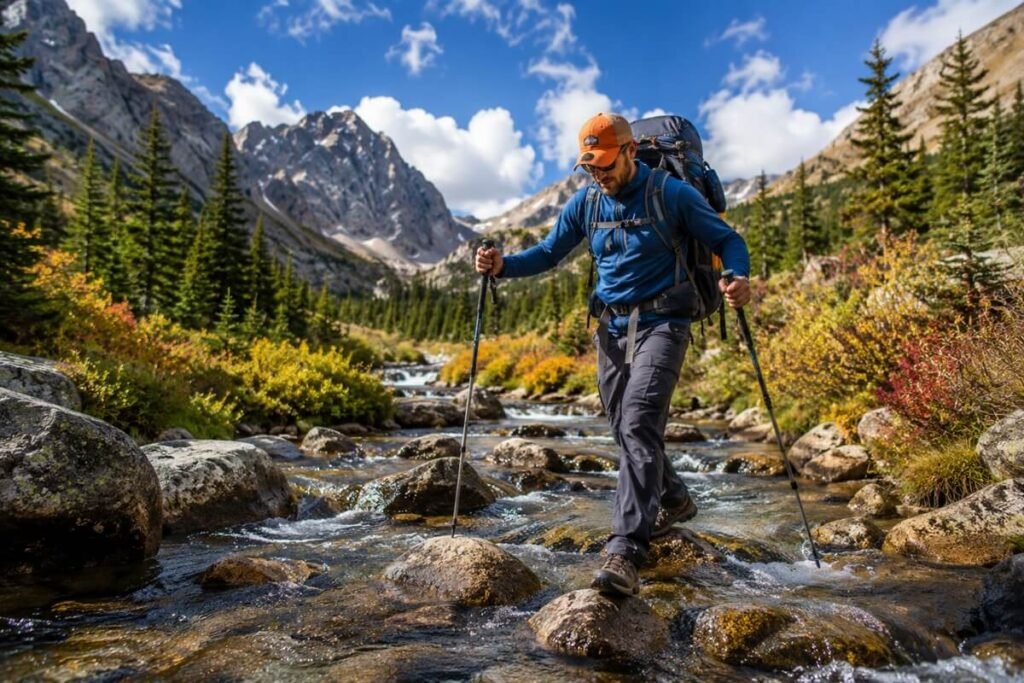
Before stepping into the water:
- Tighten loose gear.
- Secure trekking poles.
- Loosen your backpack hip belt and sternum strap so you can remove the pack quickly if necessary.
- Identify your exit point.
Preparation improves stability and response time.
Maintain Three Points of Contact
Using two trekking poles greatly improves balance.
- Move slowly.
- Keep at least three points of contact with the streambed whenever possible.
- Avoid rushing.
- Each step should be deliberate.
Face Slightly Upstream
Facing slightly into the current allows you to brace against moving water. Shuffle your feet instead of taking large steps. This keeps your center of gravity low and improves stability.
Group Crossings
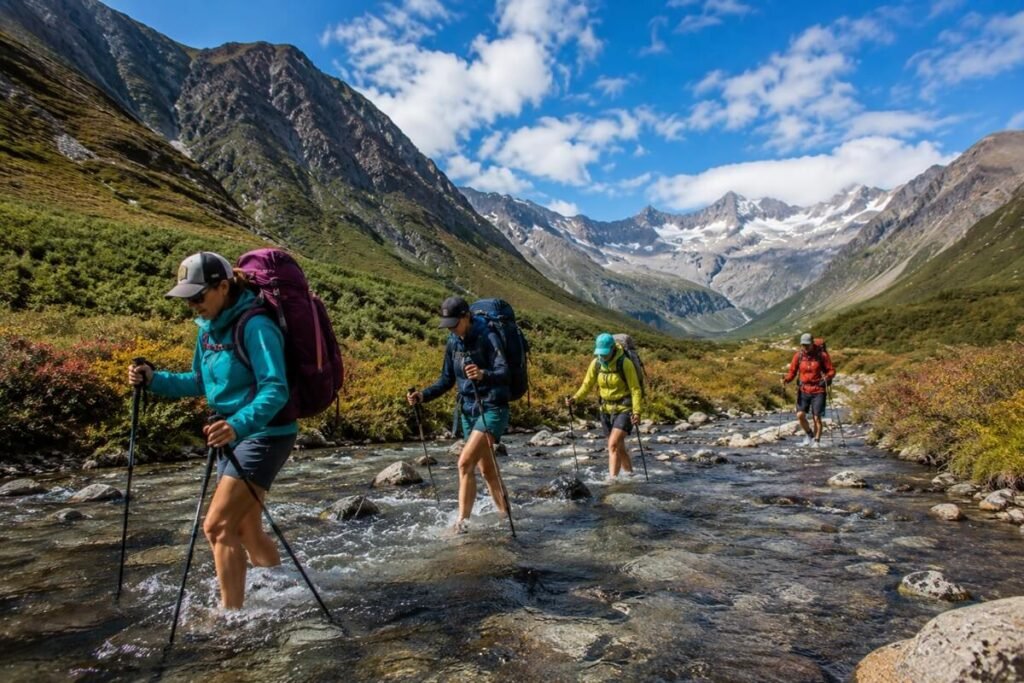
When hiking with others, avoid crowding together unless using a practiced group-crossing technique.
- Communicate clearly.
- Help each other identify stable footing.
- Allow enough space for everyone to maintain balance.
Know When to Wait
Sometimes the safest decision is simply waiting. Water levels often decrease later in the day after snowmelt slows or rainfall ends. Patience is one of the most valuable backcountry skills.
After the Crossing
Once safely across:
- Check everyone’s condition.
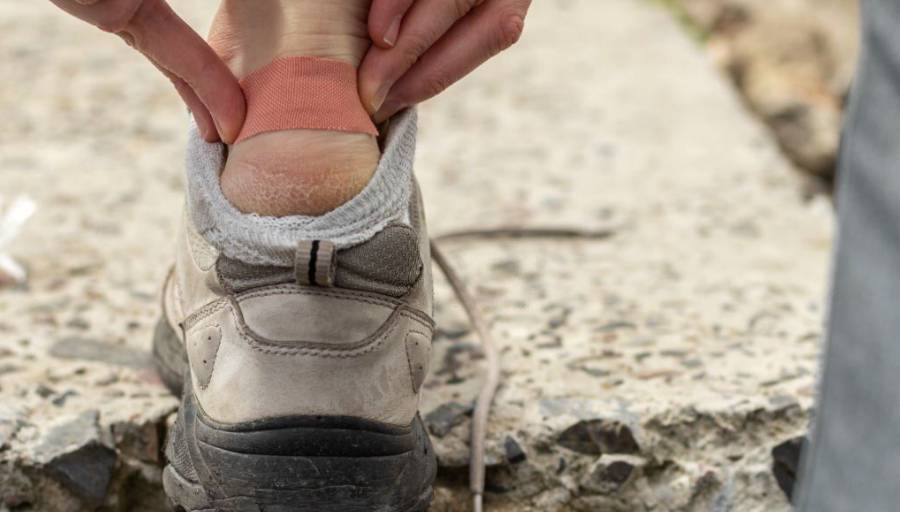
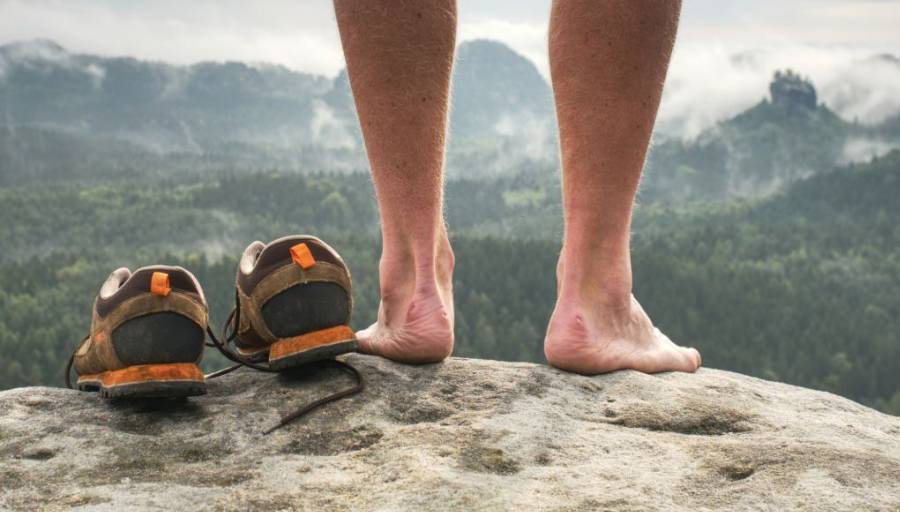
- Inspect footwear.
- Dry feet if necessary.
- Confirm your route before continuing.
A few minutes of recovery can prevent problems later in the hike. For additional beginner-friendly guidance, see How to Cross a River or Stream While Hiking Safely.
Chapter 10: Sustainable Hiking & Trail Stewardship
Advanced hiking isn’t just about covering difficult terrain or reaching remote destinations. It also means understanding how your actions affect the trails, wildlife, and ecosystems that make these adventures possible. Responsible hikers are also encouraged to follow the Leave No Trace Seven Principles, an internationally recognized framework for minimizing environmental impact while enjoying the outdoors.
Experienced hikers recognize that every footstep leaves an impact. The goal is to minimize that impact so future generations can enjoy the same landscapes.
Stay on Established Trails
It may be tempting to shortcut switchbacks or create your own route around muddy sections, but doing so damages vegetation and accelerates erosion.
Whenever practical:
- Stay on designated trails.
- Walk through mud instead of around it.
- Avoid creating new paths.
- Respect trail closures.
Well-maintained trails protect both hikers and fragile ecosystems.
Understand Trail Erosion
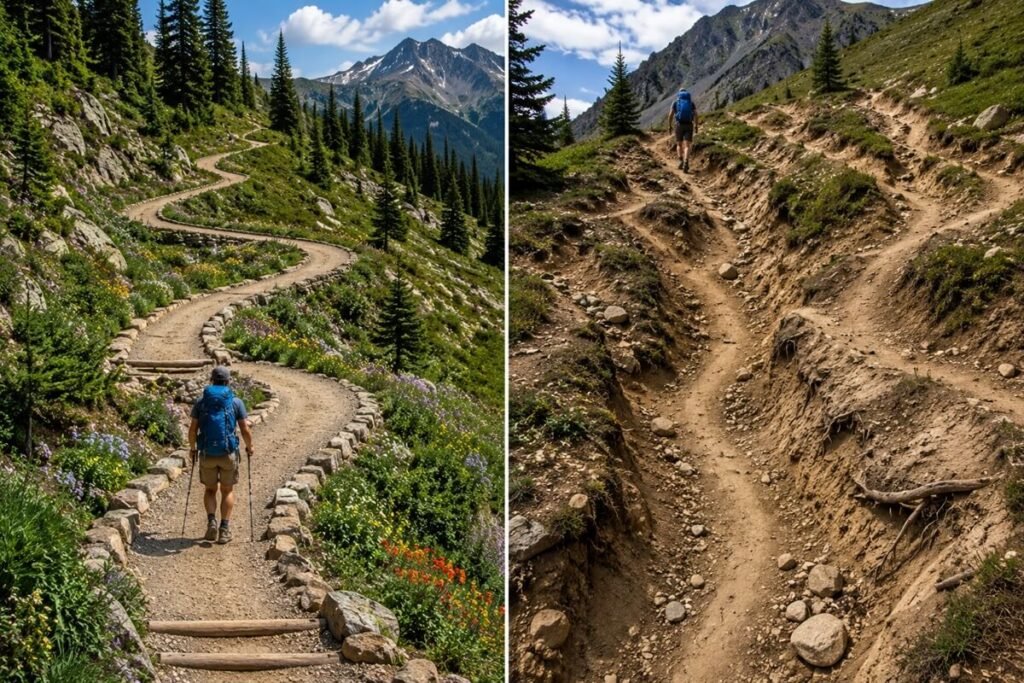
Erosion occurs naturally, but hikers can unintentionally make it worse. Common causes include:
- Cutting switchbacks
- Hiking after heavy rainfall
- Walking off-trail
- Poor drainage
- High visitor traffic
Recognizing these issues helps you make better choices on the trail.
Camp Responsibly
If you’re backpacking, campsite selection matters. Whenever possible:
- Camp only in designated areas.
- Choose durable surfaces.
- Avoid damaging vegetation.
- Keep tents away from fragile meadows.
- Respect local regulations.
Good campsite selection protects sensitive environments and reduces long-term impacts.
Respect Wildlife
Wild animals should remain wild. Observe wildlife from a distance and never:
- Feed animals.
- Approach for photos.
- Leave food unattended.
- Disturb nesting areas.
Proper food storage also protects both wildlife and future hikers. If wildlife observation interests you, check out our expert guide on How to Spot Wildlife While Hiking: Tracks, Sounds & Signs offers additional tips. Also, if you’re hiking in national parks or protected areas, the National Park Service provides excellent guidance on wildlife safety and responsible outdoor recreation.
Pack Out Everything
Everything you bring into the backcountry should leave with you. This includes:
- Food wrappers
- Fruit peels
- Tissues
- Hygiene products
- Broken gear
- Micro-trash
Leaving no trace demonstrates respect for both nature and fellow hikers.
Leave Natural Features Undisturbed
Avoid removing:
- Rocks
- Flowers
- Antlers
- Historical artifacts
- Plants
Photographs make better souvenirs than natural objects.
Share the Trail
Many trails are used by hikers, trail runners, mountain bikers, horseback riders, and families. Practice good trail etiquette by:
- Yielding when appropriate.
- Announcing yourself politely.
- Keeping noise levels reasonable.
- Respecting everyone’s outdoor experience.
Courtesy makes the trail safer and more enjoyable for all users.
Chapter 11: Decision-Making Under Pressure
Technical skills are valuable, but judgment is what keeps experienced hikers safe. Many outdoor incidents don’t happen because someone lacked fitness or expensive equipment—they happen because poor decisions compound over time. Learning to make calm, informed decisions under pressure is one of the most valuable hiking skills you can develop.
Recognize Confirmation Bias
It’s easy to become emotionally invested in reaching a summit or completing a planned route. This mindset can cause hikers to ignore warning signs.
Ask yourself:
- Am I continuing because conditions are safe?
- Or because I don’t want to turn around?
Objective decision-making is often the safer choice.
Continually Reassess Conditions
Experienced hikers don’t make one plan and blindly follow it. Instead, they repeatedly evaluate:
- Weather
- Energy levels
- Trail conditions
- Navigation
- Time remaining
- Water availability
Conditions change, and your decisions should change with them.
Know Your Turnaround Time
Before starting a hike, establish a turnaround time. If you haven’t reached your objective by that time, head back regardless of how close you are. This simple habit prevents many late-day emergencies.
Communicate Clearly
If hiking with others:
- Discuss plans beforehand.
- Share concerns openly.
- Respect different ability levels.
- Make group decisions together.
Good communication prevents misunderstandings that can lead to unsafe situations.
Stay Calm When Problems Occur
Unexpected situations happen on almost every long hike. You may encounter:
- Washed-out trails
- Injuries
- Equipment failures
- Wildlife
- Sudden storms
Rather than reacting emotionally:
- Stop.
- Assess the situation.
- Consider your options.
- Make the safest decision.
A calm response often solves problems more effectively than rushing into action.
Learn From Every Hike
One of the habits shared by experienced hikers is self-reflection. After each trip, ask yourself:
- What went well?
- What could have gone better?
- Did I carry unnecessary gear?
- Was my pacing effective?
- How accurate was my route planning?
Every hike becomes a valuable learning experience.
Chapter 12: Skills That Take Years to Master
Some hiking skills can be learned in an afternoon. Others develop only through experience. The hikers who seem effortless on difficult trails aren’t relying on luck—they’ve built countless small habits over many years.
Reading the Terrain Instinctively
Experienced hikers begin recognizing:
- Natural travel corridors
- Hidden hazards
- Efficient routes
- Safe campsites
- Water sources
This ability develops through repeated observation across different landscapes.
Predicting Weather Without Technology
Although forecasts are valuable, experienced hikers also learn to recognize environmental clues such as:
- Changing wind direction
- Cloud development
- Humidity shifts
- Temperature drops
- Animal behavior
These observations often provide early warnings before conditions deteriorate.
Knowing Your Personal Limits
Perhaps the most valuable skill is understanding your own abilities. This includes recognizing:
- When to slow down
- When to eat
- When to rest
- When to turn around
- When to seek help
Self-awareness is one of the strongest indicators of an experienced outdoor traveler.
Building Efficient Systems
Experienced hikers rarely waste time because they develop consistent routines. Examples include:
- Packing gear in the same order.
- Checking equipment before every trip.
- Filtering water efficiently.
- Breaking camp quickly.
- Managing clothing layers proactively.
Small efficiencies add up over long days on the trail.
Remaining Curious
Outdoor learning never truly ends. Every season introduces new conditions. Every trail teaches something different. Continue improving by:
- Hiking in new environments.
- Learning navigation.
- Reading trail reports.
- Practicing emergency skills.
- Sharing experiences with other hikers.
Curiosity is one of the qualities that keeps hiking rewarding for decades.
FAQs About Advanced Hiking Skills and Techniques
How can I practice hiking navigation without getting lost?
Start by practicing navigation on familiar trails before attempting unfamiliar backcountry routes. Compare your map with the terrain, identify ridges, valleys, junctions, and other landmarks, and periodically estimate your position before checking your GPS. Gradually practice in more challenging conditions, such as poor visibility or unfamiliar terrain, as your confidence improves.
How do I improve my ability to read terrain while hiking?
Make terrain observation an active habit rather than simply following the trail. Before and during a hike, identify high and low points, drainage areas, ridges, saddles, slopes, and potential hazards. Then compare those features with your topographic map. With repetition, you’ll become better at predicting what lies ahead instead of reacting to terrain after reaching it.
What should I record after a difficult hike to improve next time?
Record information that can improve future planning, such as actual hiking time, difficult sections, weather conditions, water availability, energy levels, navigation problems, turnaround points, and gear that was unnecessary or missing. Reviewing these details after each trip can reveal patterns and help you make more accurate decisions on future hikes.
How can I tell whether my hiking pace is sustainable?
A sustainable pace should allow you to continue moving for extended periods without repeatedly becoming breathless or exhausted. If you need frequent recovery stops, are struggling to maintain your pace, or notice your coordination deteriorating, slow down. Terrain, elevation gain, pack weight, weather, and altitude should also be considered when determining an appropriate pace.
How do experienced hikers decide when to change their planned route?
They continually compare the original plan with current conditions. Weather, trail damage, water levels, remaining daylight, energy levels, navigation confidence, and group condition can all justify a route change. Experienced hikers treat their route as a plan rather than an obligation and adjust it when continuing would create unnecessary risk.
What skills should I practice before attempting a multi-day hike?
Focus on navigation, pacing, energy management, water planning, weather awareness, terrain movement, campsite practices, and decision-making. You should also be comfortable using your navigation equipment and handling common changes in trail conditions. Practicing these skills on shorter trips allows you to identify weaknesses before committing to a longer adventure.
How can I practice stream crossing skills safely?
Practice water assessment and crossing techniques on safe, shallow waterways rather than waiting until you encounter a difficult crossing in the backcountry. Learn to evaluate depth, current speed, river width, footing, and downstream hazards. The goal is to develop judgment about whether and where to cross, not simply to become faster at crossing water.
What should I learn before hiking above the tree line?
Learn how exposed terrain changes your risk profile. Above the tree line, there is less shelter from wind, storms, and sunlight, while weather can change rapidly. Develop strong navigation skills, learn to monitor mountain weather, understand your turnaround options, and plan routes with limited escape opportunities in mind.
What hiking skills are most important when traveling without cell service?
Navigation and decision-making become especially important when communication options are limited. Know how to use a paper map and compass, understand the terrain, plan escape routes, monitor weather, and carry appropriate emergency equipment. You should also make sure someone knows your planned route and expected return time before leaving.
How can beginners transition from day hiking to backpacking?
Start by extending the length and complexity of familiar day hikes before carrying an overnight load. Practice navigation, food and water management, pacing, campsite selection, and packing systems during shorter trips. A gradual progression allows you to discover how your body, equipment, and decision-making perform over longer periods without immediately committing to a demanding multi-day route.
How do I evaluate whether a hiking route is beyond my current ability?
Consider more than mileage. Evaluate elevation gain, terrain difficulty, exposure, weather, altitude, water availability, navigation complexity, daylight, escape routes, and your group’s physical condition. A route becomes inappropriate when several factors exceed your current skills or when there is insufficient margin for unexpected problems. Choosing an easier route is often the better way to build experience.
What should I review after every hike to become a better hiker?
Take a few minutes to evaluate what worked and what didn’t. Consider your pacing, navigation, nutrition, hydration, clothing, equipment, route planning, weather decisions, and overall energy levels. Also note any moments when you felt uncertain or unprepared. Turning those observations into specific changes for your next hike creates a continuous learning process rather than treating each trip as an isolated experience.
Final Thoughts
Advanced hiking isn’t defined by summits, mileage, or the difficulty of a trail. It’s defined by the ability to make thoughtful decisions, adapt to changing conditions, and move confidently through the outdoors while respecting the environment.
Every hike offers an opportunity to refine your skills. As you gain experience, you’ll begin to notice subtle details that once went unnoticed—changes in terrain, shifts in weather, patterns in wildlife movement, and the small decisions that make every journey safer and more enjoyable.
Remember that experience isn’t measured by how many trails you’ve completed. It’s measured by the judgment you develop along the way. Whether you’re planning your first multi-day backpacking trip or preparing for more challenging mountain adventures, continue building your skills one hike at a time. Stay curious, hike responsibly, and never stop learning.
The trail will always have something new to teach.


One Comment