How to Clean Climbing Shoes: 3 Easy Steps + Care Tips

Field-Tested Note: We’ve cleaned dozens of climbing shoes made from leather, synthetic microfiber, and aggressive rubber compounds after indoor bouldering sessions and outdoor sport climbing. The methods below are the same low-risk maintenance routine we use because they remove dirt and odor without weakening adhesives or damaging climbing rubber.
Whether you’re an outdoor climbing addict or an indoor bouldering enthusiast, there’s nothing quite like knowing how to clean climbing shoes to enhance their lifespan and ensure long-term comfort.
When it comes to cleaning climbing shoes, we advocate for gentle maintenance, steering clear of the washing machine, as it could potentially damage the sole and compromise the architecture of your liner. In this article, we will elucidate the proper method for cleaning climbing shoes and maintaining them to ensure longevity while respecting their structural integrity.
Quick Answer
- Brush away loose dirt before using water.
- Clean the upper with mild soap and a soft sponge.
- Wipe the rubber outsole with clean water.
- Use baking soda to reduce odor.
- Always air dry away from direct sunlight or heaters.
- Never machine wash climbing shoes.
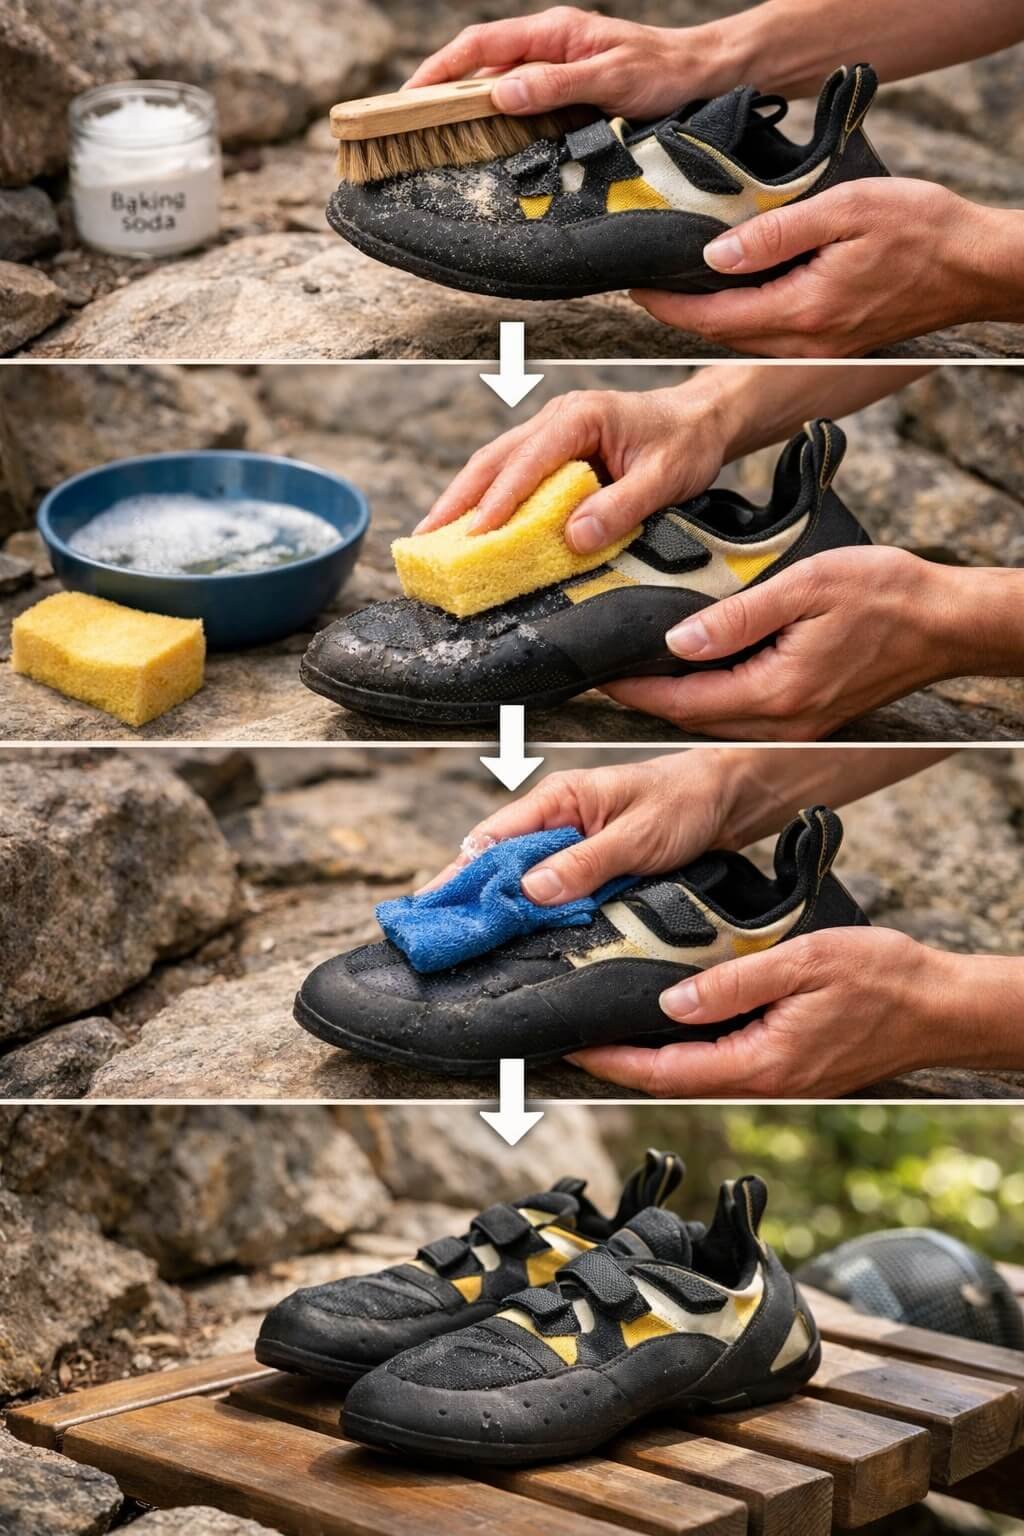
How to Clean Climbing Shoes – Step by Step
Let’s see how to clean your climbing shoes in three simple steps:
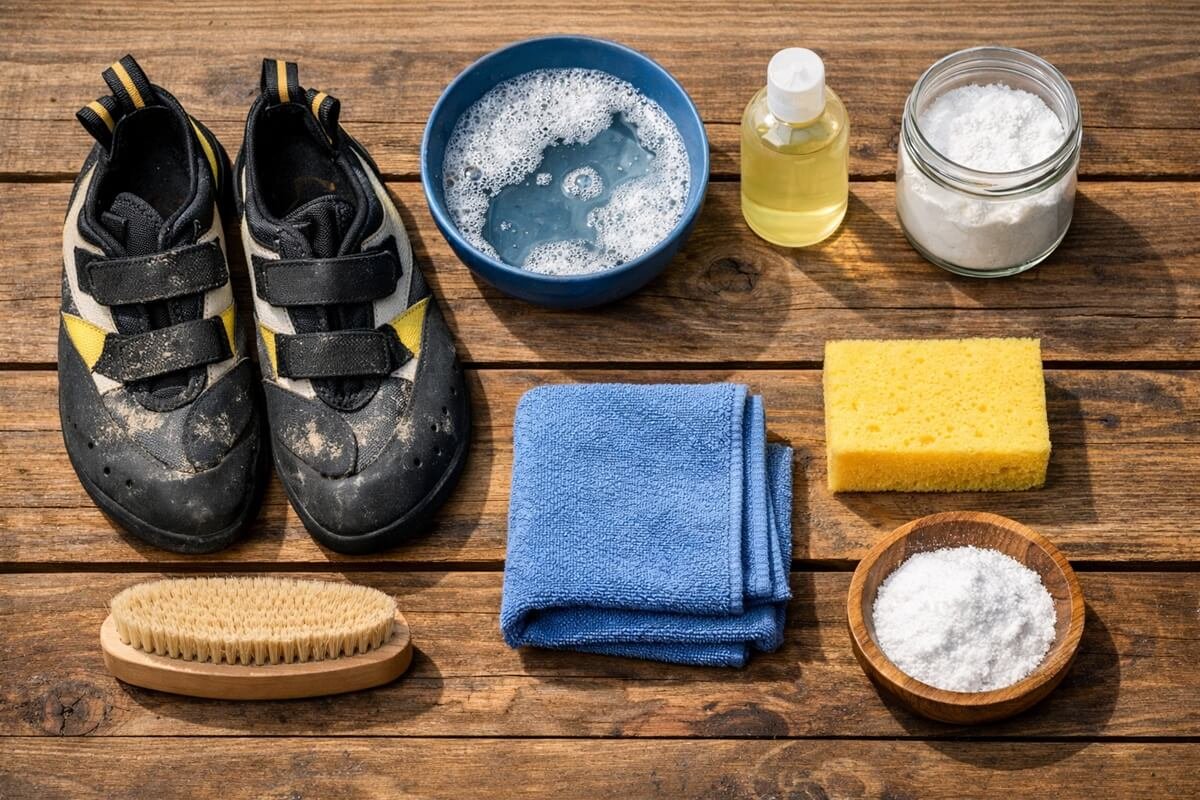
First Step: The Fabric
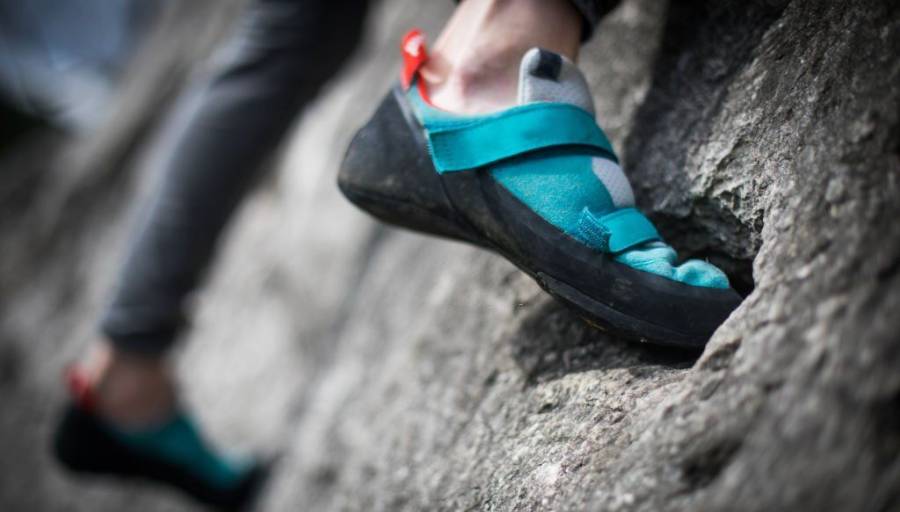
Begin by addressing the fabric of your climbing shoes. To do this, take a soft-bristled brush and gently rub the outside of your climbing shoes to remove traces of dirt and dust accumulated over the sessions. Make sure the liner is completely dry beforehand for this step. Otherwise, it could have the opposite effect and embed dirt. When your liner has been rid of its impurities, wipe with a damp, (soapy sponge) to thoroughly clean the fabric.
🥾 Expert Tip: Before using any water, tap the shoes together outside to knock off loose dirt and chalk. This prevents abrasive particles from being rubbed into the fabric during cleaning, helping the upper last longer.
Second Step: The Outsole
The second step concerns the outsole of your climbing shoes. This is the part most exposed to the ground: pebbles, dust, mud, chalk… Enough to leave several traces on the black sole which has the advantage (or here, the disadvantage) of being particularly adherent to facilitate your progress. on the way.
To rid it of dirt, simply take the sponge previously used, then rinse it, and then pass it over the sole. Thanks to the smooth surface of this one, you will see the dirt will go away easily.
🥾 Expert Tip: Avoid using stiff wire brushes or harsh chemicals on the rubber outsole. A soft sponge or cloth is enough to remove dirt while preserving the sticky climbing rubber that provides grip on rock and indoor holds.
Third Step: The Insole
Last but not least*: the insole of your liner. Since we generally climb without socks, maintaining this sole is essential to drive out bad odors and other bacteria. If a deodorizing spray is useful after a session, it does not replace more thorough care. And nothing better than a little grandmother’s recipe, very simple but terribly effective!
After each of your climbing sessions, place a teaspoon of baking soda in your climbing shoes and shake them slowly to evenly distribute the powder so it can absorb the moisture. You will see bad odors will be considerably reduced!
However, be careful to shake your boots well before climbing again, at the risk of reliving this unpleasant feeling of sand in your shoes after the beach! And if this trick isn’t enough to give your shoes a boost of freshness, don’t hesitate to use a damp brush like a dishwashing brush with a little Marseille soap to scour the sole thoroughly.
After having rigorously followed these three steps, leave your shoes to dry in the open air. If possible, away from the sun or any source of heat that could damage the rubber. And then you will see your shoes look almost brand new for your future climbs!
🥾 Expert Tip: After every climbing session, loosen the straps or laces and allow your shoes to air out completely before storing them. Dry shoes develop fewer odors, reduce bacterial growth, and help prevent the glue from breaking down prematurely.
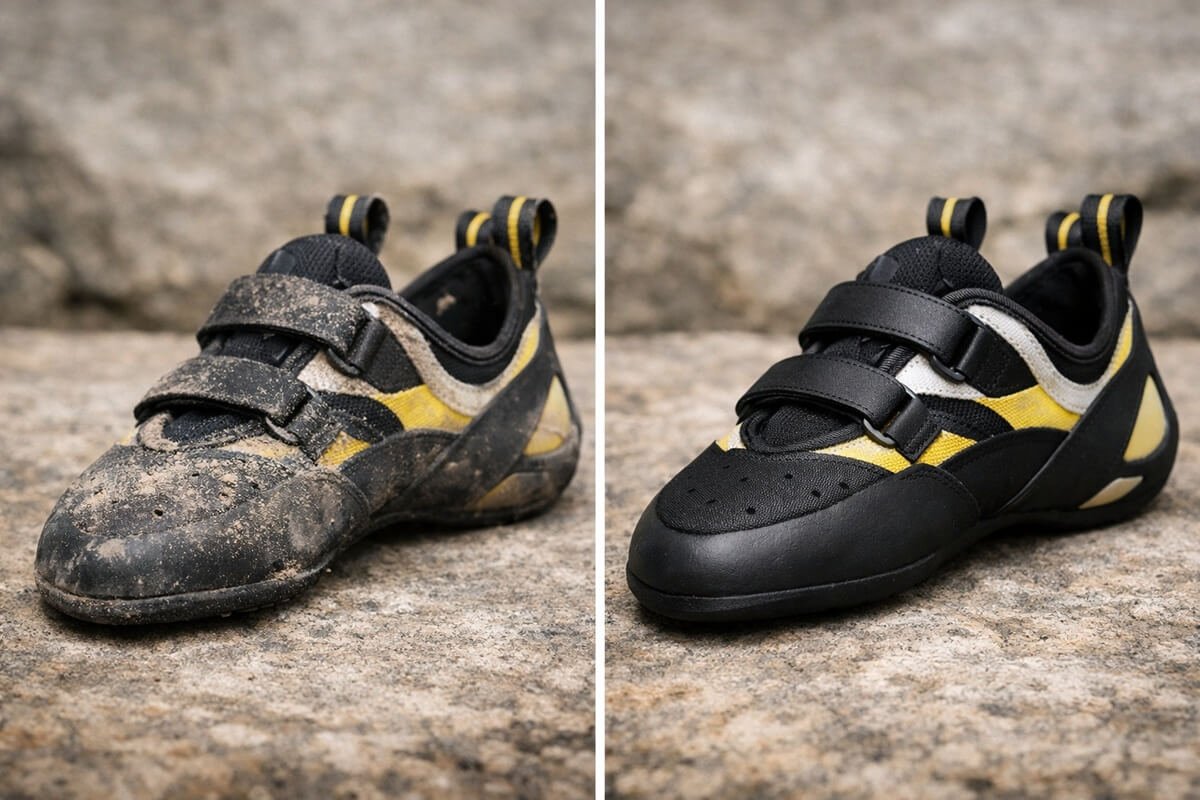
Who This Cleaning Method Is Best For
This guide works for most climbing shoes, including leather, synthetic, lace-up, Velcro, and slipper-style models used for indoor climbing, bouldering, trad climbing, and sport climbing. Whether you climb indoors, tackle outdoor sport routes, or enjoy minimalist footwear on the trail, proper shoe care helps extend the life of your gear.
If you’re also looking for lightweight trail footwear, check out our guide to the best barefoot hiking shoes.
Some Additional Tips for Cleaning Climbing Shoes
To clean climbing shoes properly, here are some extra tips that should be followed:
- If the odor is a problem, you can sprinkle baking soda with wash water to help neutralize the odor.
- Air drying is the most common way to remove foot odor from shoes. If you spend time on hiking trails, learn how to waterproof hiking boots to keep them performing in wet conditions.
- You can also use deodorizing powder in the shoes when they are dry.
- Avoid using powder in wet or damp shoes because it will clump or form a crusty residue inside the boot that is difficult to remove.
For additional guidance, be sure to follow the video guide below:
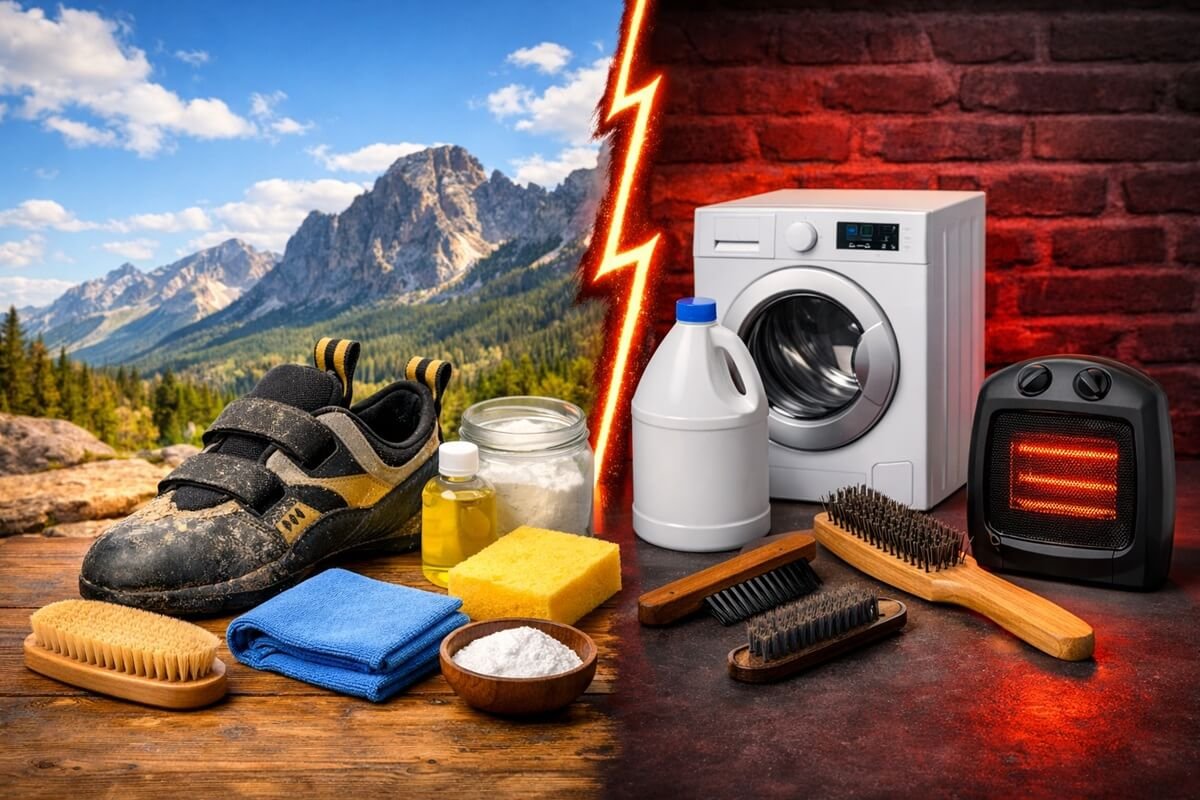
Common Mistakes to Avoid
- Using a washing machine.
- Drying shoes beside a heater.
- Using bleach or harsh detergents.
- Leaving wet shoes inside a backpack.
- Scrubbing the rubber aggressively with abrasive brushes.
Recommended Cleaning Schedule
| Maintenance | Frequency |
|---|---|
| Brush off dirt | After every climb |
| Clean outsole | Every 2–3 sessions |
| Deep clean upper | Monthly |
| Odor treatment | After each climbing session |
FAQs About Cleaning Climbing Shoes
How to clean the rubber of my climbing shoes?
A little water and vigorous scrubbing with a towel or an old toothbrush can do wonders. You can also try 90° alcohol in case of stubborn dirt. To avoid such an accumulation of materials, always wipe your shoes before climbing.
When should you clean my climbing shoes?
Good advice is as infrequently as possible, especially if you’re a climber whose sweat is not an issue and you don’t swap shoes with other partners. Avoid doing it before your cliff or boulder exit, your feet and performance may suffer. Prefer the end of the session, as soon as your liner remains wet it’s time to pamper it. Don’t wait for your shoes to smell foul either. Smelly boots are a risk of mycosis.
Remember to use an odor destroyer after each session for more hygiene. Abandon storage in a plastic bag. Avoid leather for your slippers and choose contemporary microfiber constructions instead.
Can I wash my climbing shoes in the washing machine?
No, it’s not recommended. Using a washing machine can damage the sole and affect the shoe’s architecture. Stick to manual cleaning methods.
Should I resole my climbing shoes, and how often?
Resoling depends on usage. If you climb regularly, consider resoling every 6-12 months or when you notice a decrease in performance due to worn-out soles. However, choosing the correct size is essential for both comfort and performance. If you’re shopping for hiking boots, our guide on how to choose hiking boot sizes to find the right fit.
Can baking soda damage climbing shoes?
No. When used in small amounts and removed before climbing, baking soda is generally safe for both leather and synthetic climbing shoes.
Conclusion
Cleaning your climbing shoes doesn’t take much time, but it can make a noticeable difference in their comfort, odor control, and overall lifespan. By brushing away dirt, cleaning the upper and rubber with mild soap, treating the insole to reduce moisture and bacteria, and always letting your shoes air dry naturally, you’ll keep them performing at their best for many climbing sessions to come.
Regular maintenance is far better than deep cleaning only when your shoes become dirty or smelly. With a simple care routine after each climb, you can preserve the grip, fit, and durability of your favorite climbing shoes while avoiding unnecessary wear.
If you also use hiking footwear alongside your climbing gear, our Scarpa Rush TRK GTX review covers the comfort, durability, and waterproof performance of one of the most popular hiking boots for outdoor adventures.