How to Choose Mountaineering Boots: A Complete Buyer’s Guide
I’ve used mountaineering boots for multi-day alpine hikes, snow travel, and glacier routes over the past decade. In this guide, I share what I’ve learned from testing different boot types, crampon systems, waterproof membranes, and insulation levels.
To evolve in complete safety at high altitudes, you need the real support of boots that are comfortable, efficient, protective and reassuring: this is the role of the mountaineering boots.
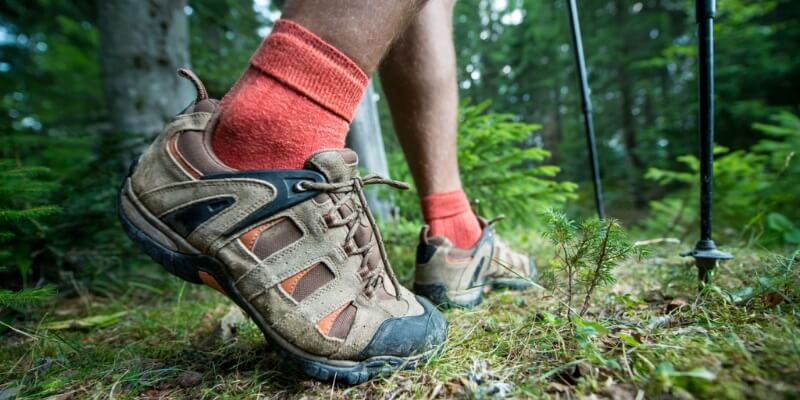
We saw in our guide how to choose the right hiking boots that allow you to reach the foot of the routes, or even to make small climbs. If you’re still comparing options, check out our roundup of the best hiking boots for different terrains and hiking styles. Yet, mountaineering boots remain essential equipment for more committed climbs and hikes in high altitudes, as well as for the practice of ice climbing and extreme cold expeditions.
| Mountaineering Type | Boot Stiffness | Crampon Compatibility | Best For |
| Easy Mountaineering | Semi-rigid | Semi-auto | Alpine hiking |
| Technical Mountaineering | Rigid | Automatic | Steep snow & ice |
| Expeditions | Very rigid | Automatic | Extreme cold |
Key Takeaways
- Choose boot stiffness based on terrain and crampon needs.
- Waterproof membranes improve comfort in snow and wet conditions.
- Proper fit is more important than brand.
- Winter mountaineering requires insulated boots.
- Semi-rigid boots are the best choice for most hikers entering mountaineering.
First Think About Safety in the Mountains
Mountain accident statistics reveal that the majority of incidents occur in terrain not classified as “mountaineering.” These incidents often involve loss of balance or fall on medium-altitude slopes where the exposure is sometimes more severe than it appears.
In this terrain, boots play a key role. The quality of grip of the sole and an adapted rigidity make it possible to control slopes and slippery surfaces such as grass slopes, wet ground, and snow. It is therefore essential to complete your hiking equipment with the right boots to fully enjoy treks and mountain walks.
Safety Criteria for Selecting Your Mountaineering Boots:
- Rigidity: it is essential for holding the foot and gripping it in mountainous terrain.
- Support: good support is the result of boots adapted to your feet with a high upper, which supports the ankle joint and the bottom of the tibia.
- The grip of the sole: the grip of the sole depends on the quality of the material used and its notching. Soft rubbers have better grips on the rock but they wear out quickly, which is penalizing because resoling is quite expensive and can be done more or less well. Hard rubbers will be more resistant. We are looking for the right compromise according to the terrain practiced (softer for rock climbing, harder for the high road and classic hiking) but we now find good soles with longevity and satisfactory rock grip.
- Protection / Impermeability: Stone guard, side reinforcements, and type of material used will ensure the longevity of the boots and will protect you against external elements such as stone and rocks.
How to Choose Mountaineering Boots
Let’s see our today’s guide on how to choose mountaineering boots:
The Essential Constituents of Mountaineering Boots
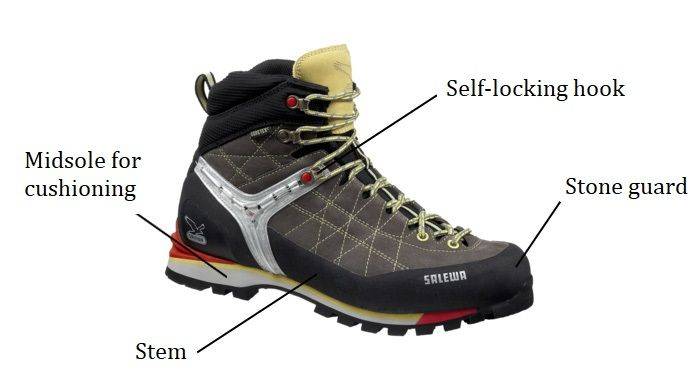
- Self-locking hook: Usually located at the top or in the middle of the boot, it makes it possible to block all or the lower part of the tightening for more precise adjustments and locking of the hold of the shoe during mountaineering. We tighten more on the descent than on the ascent to support the foot.
- Cushioning or midsole: Very important for absorbing shocks and relieving the hiker’s joints and lower back. It is wider at the heel than at the front on technical models where the aim is to promote precision and the “feel” of the terrain. For long-distance courses and rough terrain, the quality of the cushioning is essential.
- Stem: More or less rising. Maybe in mesh, synthetic, split leather, nubuck, leather…
- Stone guard: Rigid part on the front of the boot which avoids shocks with blocks of stone. Also limits abrasion of the front of the boot.
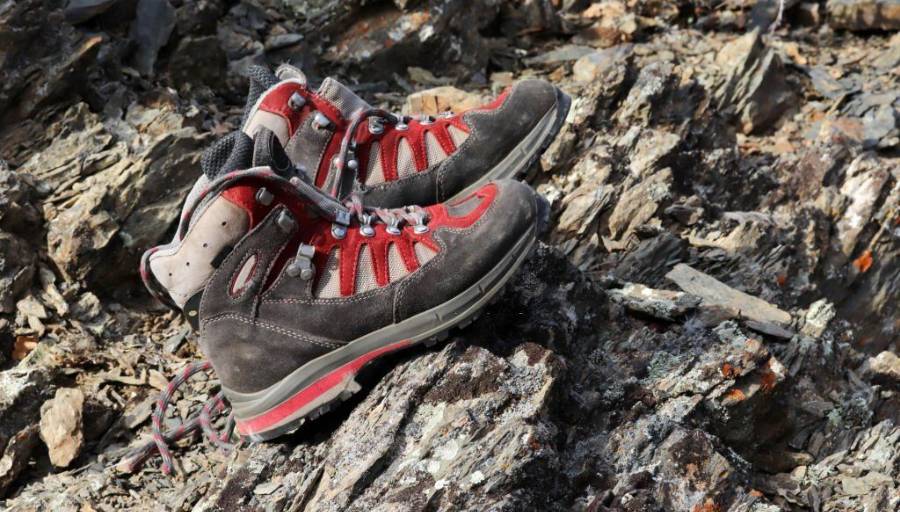
Types of Mountaineering Boots
Mountaineering boots come in several categories:
- Winter mountaineering and expeditions: footwear designed for temperatures below -20°C is often equipped with over boots (more or less depending on the model). They mostly consist of a slipper that slips into boots. Thanks to their front and rear overhang, they accept self-attaching crampons.
- Technical mountaineering for difficult runs: rigid shoes to hold without too much effort on the supports found in vertical environments. Their rigidity allows the use of crampons with automatic fasteners (front and rear overhang).
- Haute route mountaineering and easy mountaineering: boots adapted to the altitude, sometimes off-trail paths with passages in snow or even ice. They are versatile and suitable for snow races F to AD with slopes up to 45°. These are mountaineering boots with high uppers and semi-rigid soles, semi-automatic crampons.
Different Boots for Different Terrain
First, you have to choose a pair of boots that fits your feet. Hikers and climbers with slim foot profiles should pay special attention to fit, as excessive movement inside the boot can lead to blisters and reduced stability. If you struggle to find a secure fit, our guide to the best hiking boots for narrow feet may help.
Then take boots that you like that correspond to your nature as a mountaineer: all leather or lighter materials with GTX membrane, very high or light… Some models are very versatile and can do everything from hiking trails to Mont Blanc and 45° slopes.
For most mountain enthusiasts, it could be interesting and sufficient to have two pairs: one for light mid-mountain style hiking and a pair for high road/easy mountaineering with semi-automatic crampons. Then there are the more technical boots that interest those who want to go out in the hard and cold. Also, choose according to the massifs frequented and your level of training. The less you train, the more protective the boot will need to be. The lightness, always double-edged, goes more with a good level of form and dry mountain conditions.
Choosing the Right Stiffness
Rigidity is essentially due to the sole and is tested by trying to bend the boot. If it twists like a sponge, it is considered very flexible. At the other extreme, if you can’t bend it, it’s considered very stiff. The rigidity can be almost total on technical mountaineering boots, i.e. you can hardly make them flex and low for minimalist hiking boots.
At first glance, the rigidity of boots may seem unpleasant, but on a long route, it will support the lower leg and relieve the efforts of the foot in steep terrain. In the mountains, a lack of rigidity on the part of the boots will be synonymous with the foot, which will instinctively seek to compensate with muscular effort.
So don’t hesitate to choose fairly rigid boots if you want to test the waters. With a fit adapted to your feet, you won’t suffer from rigid boots and you will be able to check for hours, and the rigidity will bring you comfort and safety.
“Proper support is especially important for hikers who experience foot pain or heel discomfort. Those dealing with chronic foot issues may benefit from footwear designed specifically for plantar fasciitis, which offers enhanced cushioning and arch support.”
Many falls are unfortunately so-called “fatigue” falls that occur when the hiker is at the end of his muscular resources in the tibia/ankle area. In the case of a poorly trained hiker, this fatigue can occur quickly and have significant effects.
The continuous solicitation of the foot/ankle/calf area can become a point of suffering that solicits the mind and its own resources. As the mind in turn becomes vulnerable, the hiker will be less lucid and more sensitive to the difficulties of the terrain. The risk factor will therefore increase considerably.
Waterproofing and Waterproof Membrane
This is a fundamental point for committed mountain activities. But don’t believe that because the manufacturers talk about waterproofing your boots completely waterproof (I don’t know of any apart from rubber boots).

Low boots, called approach boots, are very sensitive to water because of their opening. As a result, the manufacturers do not try to equip them with a membrane. This is a mistake in my opinion because a 3-minute walk in the wet grass will make you come home crestfallen. So let’s forget this type of boot when talking about waterproofing and focus on high boots.
In the classification of merchants, we will read: good impermeability, very good impermeability, and waterproofness. This means that some models are more or less sensitive to water, and above all to hot snow. There are few mountain boots whose water tightness really resists 10 hours in hot snow or shells, expedition boots with overboots.
The essential point remains in the waterproofness/breathability complex. Indeed, some plastic shells are more waterproof but quite poor in breathability. As a result, we are witnessing frostbite in these north-face shoes due to excess condensation. The foot perspires during exercise and it needs shoes that are both protective of the aqueous element and breathable to evacuate its own humidity.
My use of boots for a few decades leads me to believe that the membrane is a very positive element in the fight against wet feet. It is intended to be both waterproof and breathable and that’s exactly what it takes. I find that my Asolo Titan GTX is badly scratched after 10 years of mountaineering but the GTX membrane continues to do its job satisfactorily.
On the other hand, the “hydrophobic treated” leathers that I have used (Trappeur TD+ and Nepal Trek) invariably wet my feet in “hot snow”. However, the membrane does not do all the work, it can be faulty depending on its quality and certain conditions. Because not all membranes are equal.
Thermicity of Your Mountain Boots
Almost all traditional mountaineering and high road boots even the light ones can withstand temperatures of around -10°C IN MOVEMENT and they are not too tight.
Then there are a lot of models with enough leather thickness or light materials and Thinsulate type insulating layers, which can withstand -20°C. Be careful, you need specific shoes designed for winter. The sole plays a big role in thermicity. When the sole is insufficient, first degree frostbite quite often occurs on the toes and the sole of the foot. We can therefore increase its thermality by replacing the insole with a more insulating sole.
Boots and Choice of Crampons
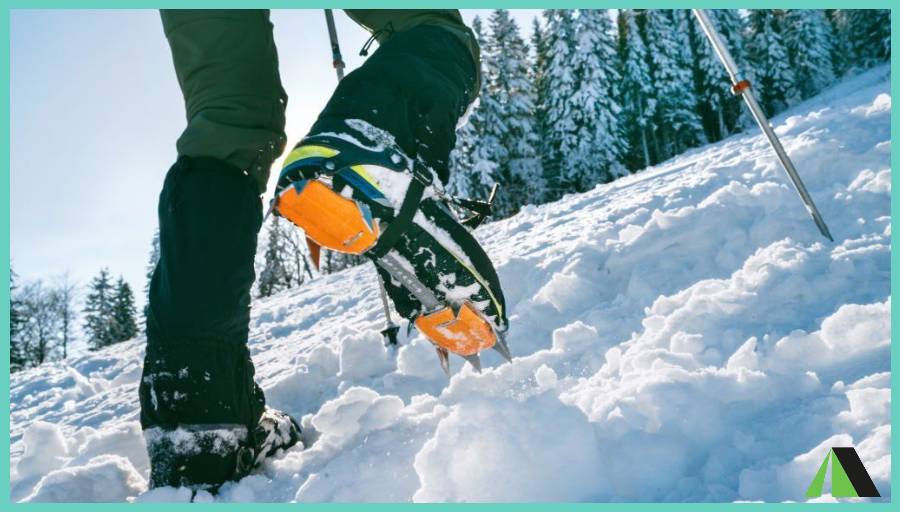
Crampons are like “steel crabs” that you attach to your boots for walking on snow or ice. They come in lighter alloys for easier terrains, reducing the weight you carry during ski touring. Even if you’re not a hardcore mountaineer, understanding this is crucial. Snow in the mountains is a significant safety concern, and some valleys stay snow-covered all summer.
You might regret not having crampons for your boots when you come across an appealing route with snowy passages. Make sure to choose your shoe model based on the type of crampon you might need.
The different types of crampon attachment correspond to the degrees of rigidity of boots. Rigidity determines the use of quick releases because these require that the boots constantly keep the same dimension, even in flexion. If the distance between the front and the back of the boot decreases, the auto and semi-auto fasteners no longer hold.
Indeed, “strap-on” crampons with polyamide and neoprene straps are versatile and can typically fit various types of boots. But we can only use them effectively if the boot has minimum resistance. As said above, some crampons now adjust to fairly flexible soles for reasonable durations. But be careful, adapting crampons to flexible and light boots is a game that can sometimes be dangerous. Also, if the crampon is poorly maintained, it will be easier to twist the ankle and the straps may tend to shear the foot and cut off blood circulation.
The semi-auto crampons have a quick release at the heel. They are easier to lay, especially in difficult terrain. They are also more stable and suitable for mountaineering. And can be used with shoes that have a heel overhang and sufficient rigidity. Auto crampons are reserved for really stiff mountaineering boots that have an overhang at the toe and heel.
Feminine Sensitivity
Choosing mountaineering boots can indeed be challenging for women. Women’s feet tend to be more sensitive and have morphological differences compared to men’s feet. Issues such as irritation from rubbing, especially on the tibia, affect nearly half of female users. The development of specific feminine models by manufacturers is a recognition of these challenges. In many cases, these models are crafted to address the unique constraints and requirements of women’s footwear.
I put here the link to a comfortable pair of boots the Mauria Gtx from Lowa. This model is an illustration of the efforts made by manufacturers to equip women who are difficult to fit. Some stores offer a wide range of mountain boots dedicated to women with good deals all year round.
Frequently Asked Questions About Mountaineering Boots
Can I wear mountaineering boots for regular hiking?
You can, but they feel heavier and less comfortable than standard hiking boots on well-maintained trails. Mountaineering boots are designed for rough terrain, snow, ice, and technical routes where their added support and rigidity become valuable.
How long do mountaineering boots last?
A quality pair of mountaineering boots can last for many years with proper care. Their lifespan depends on factors such as frequency of use, terrain, maintenance, and construction quality. Regular cleaning and proper storage can help extend their durability.
Should mountaineering boots fit tightly?
Mountaineering boots should fit snugly without causing discomfort. Your heel should stay securely in place, while your toes should have enough room to avoid hitting the front of the boot during steep descents.
Can women wear men’s mountaineering boots?
Yes, but many women find that women’s-specific models provide a better fit due to differences in heel shape, foot volume, and ankle structure. The best choice is always the boot that fits your foot comfortably and securely.
What are the most important factors when choosing mountaineering boots?
The most important factors include fit, stiffness, waterproofing, insulation, intended terrain, and crampon compatibility. Choosing a boot that matches your specific activities is more important than simply selecting the most expensive model.
Footwear is only one part of a safe and comfortable alpine setup. If you’re planning multi-day climbs or high-altitude expeditions, choosing a reliable shelter is equally important. Our guide to the best tents for mountaineering covers shelters built to withstand harsh mountain weather and challenging conditions.
Conclusion
Selecting the right mountaineering boots is crucial for a comfortable and safe mountain experience. Consider factors such as insulation, compatibility with crampons, and ankle support. Addressing individual foot sensitivities is vital to prevent common issues like tibial irritation.
To ensure a long life for your mountaineering boots, rinse them with clear water and dry them after each use before storing them in a dry place. This method avoids the phenomenon of oxidation on the metal parts of your crampons. Follow the advice on the instructions for use concerning the sharpening and filing of your points.
You are now hard at work, or almost… Don’t forget to send us the experience of your mountaineering.